Billing
On this page, you can find an explanation of how to use Billing Section in the Cloud Console.
Table of contents
User Billing page
The Billing section displays only Organizations where the User has the owner or billing administrator role. More detailed information about User roles within an Organization can be found here - Users within Organization.
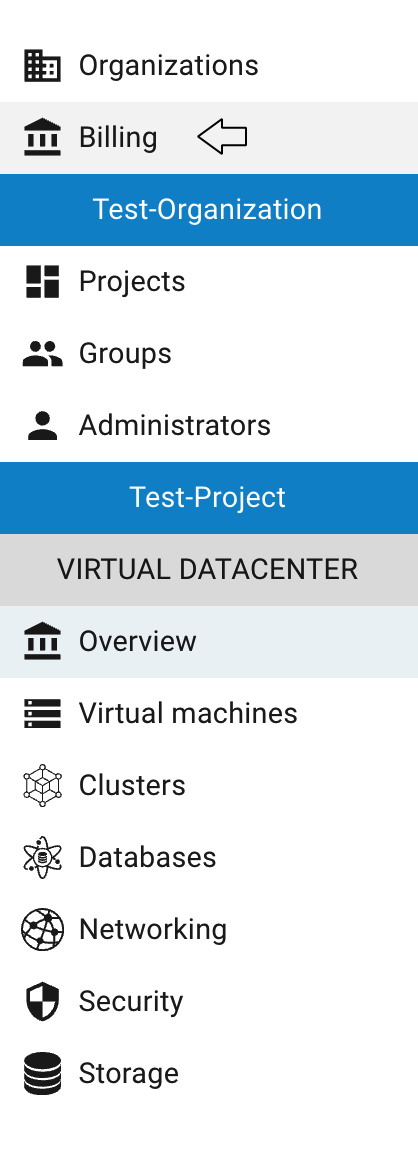
To access billing information, select Billing from the side-bar menu:
💡 Users assigned only the billing administrator role do not have permission to manage Organization resources and can only access billing-related information:
This action will redirect you to the User Billing page, where you can:
- view billing information for all organizations where you have the owner or billing administrator role;
- generate a consolidated billing report for all these organizations using the Generate Billing Report button;
- update list of billing administrators for the organization using the actions icon (available only to Organization owners).
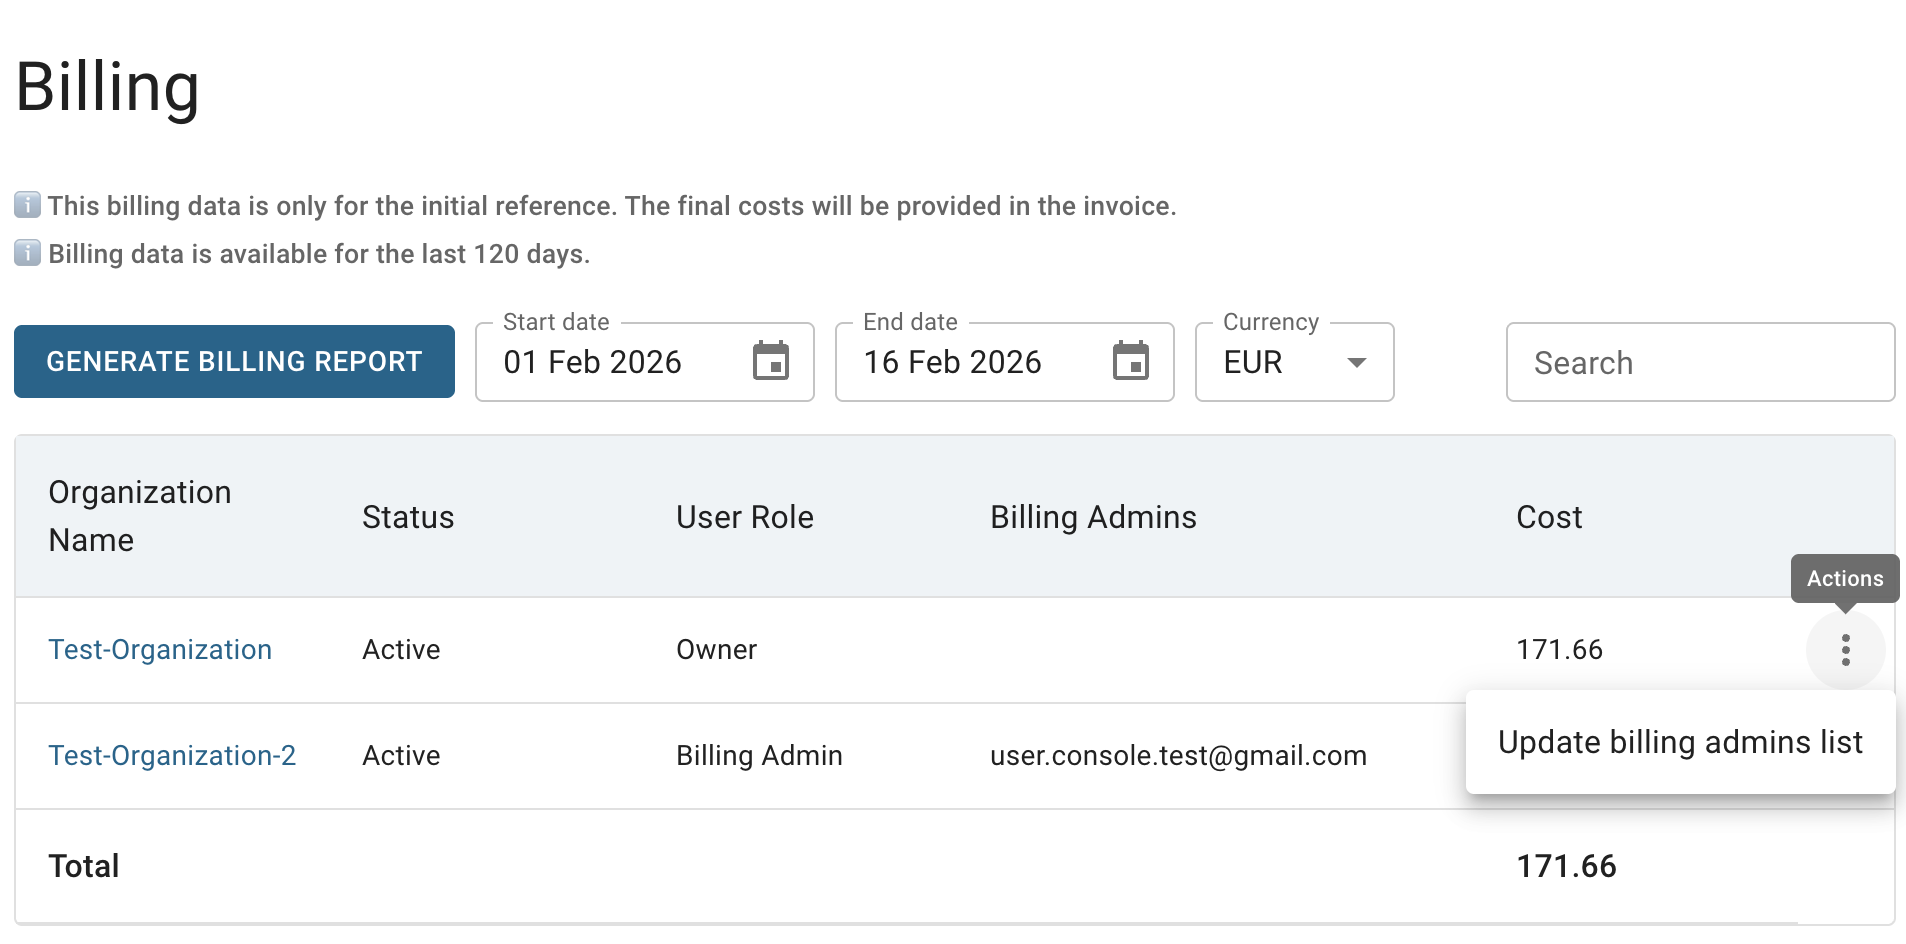
Additionally, from this page, you can navigate to the Organization Billing Overview page by clicking on the appropriate Organization name.
More detailed information about this page can be found in the sections below.
Generate Consolidated Billing Report
To generate a consolidated billing report for all Organizations where you have the owner role, follow these steps:
- go to the User Billing page and click the GENERATE BILLING REPORT button located in the upper left corner;
- select the desired billing period on the next opened Generate billing report window and click the DOWNLOAD button:
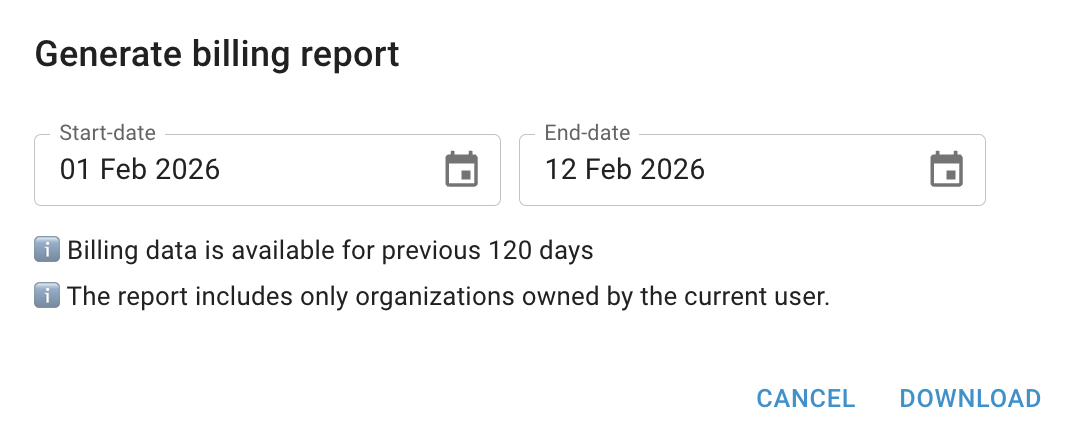
After completing these steps, the generated report will be automatically downloaded to your device.
The generated report includes aggregated data across all Organizations where you have the owner or billing administrator role.
To obtain a detailed billing report for a specific Project, generate it from the corresponding Project Billing Overview page.
Update Billing Administrators list
To add or remove a Billing Administrator and grant access to the Organization’s billing information, follow these steps:
- identify the Organization, that you want to open access on the User Billing page;
- click the Actions icon and select the Update billing admins list from the available options;
- enter or update the E-mail address of the User that you want to add, and click on the UPDATE button:
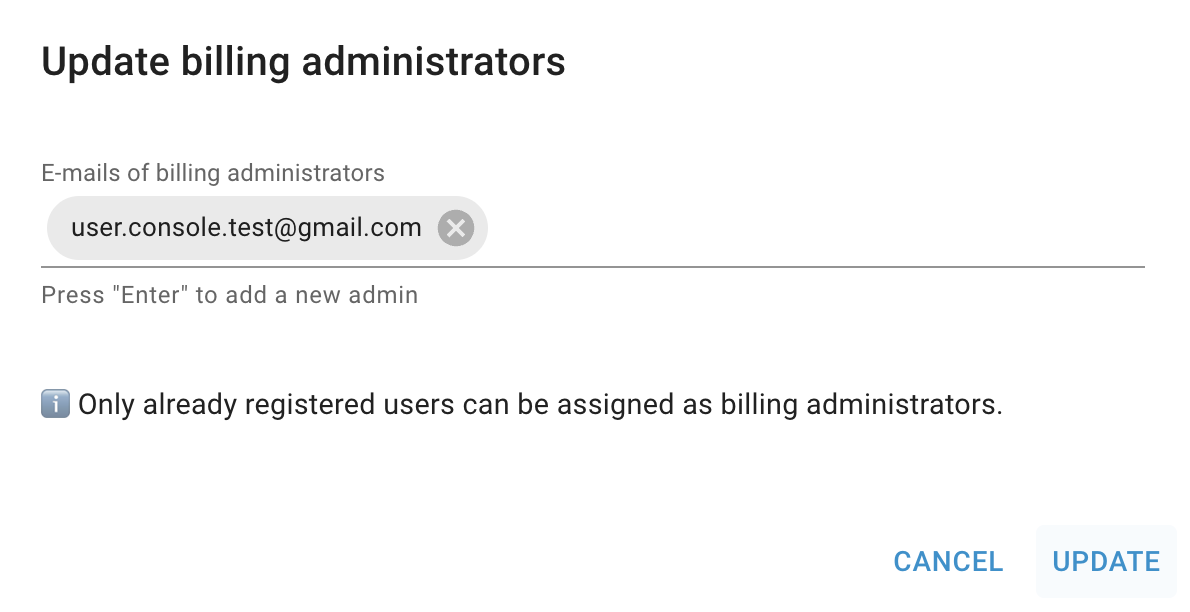
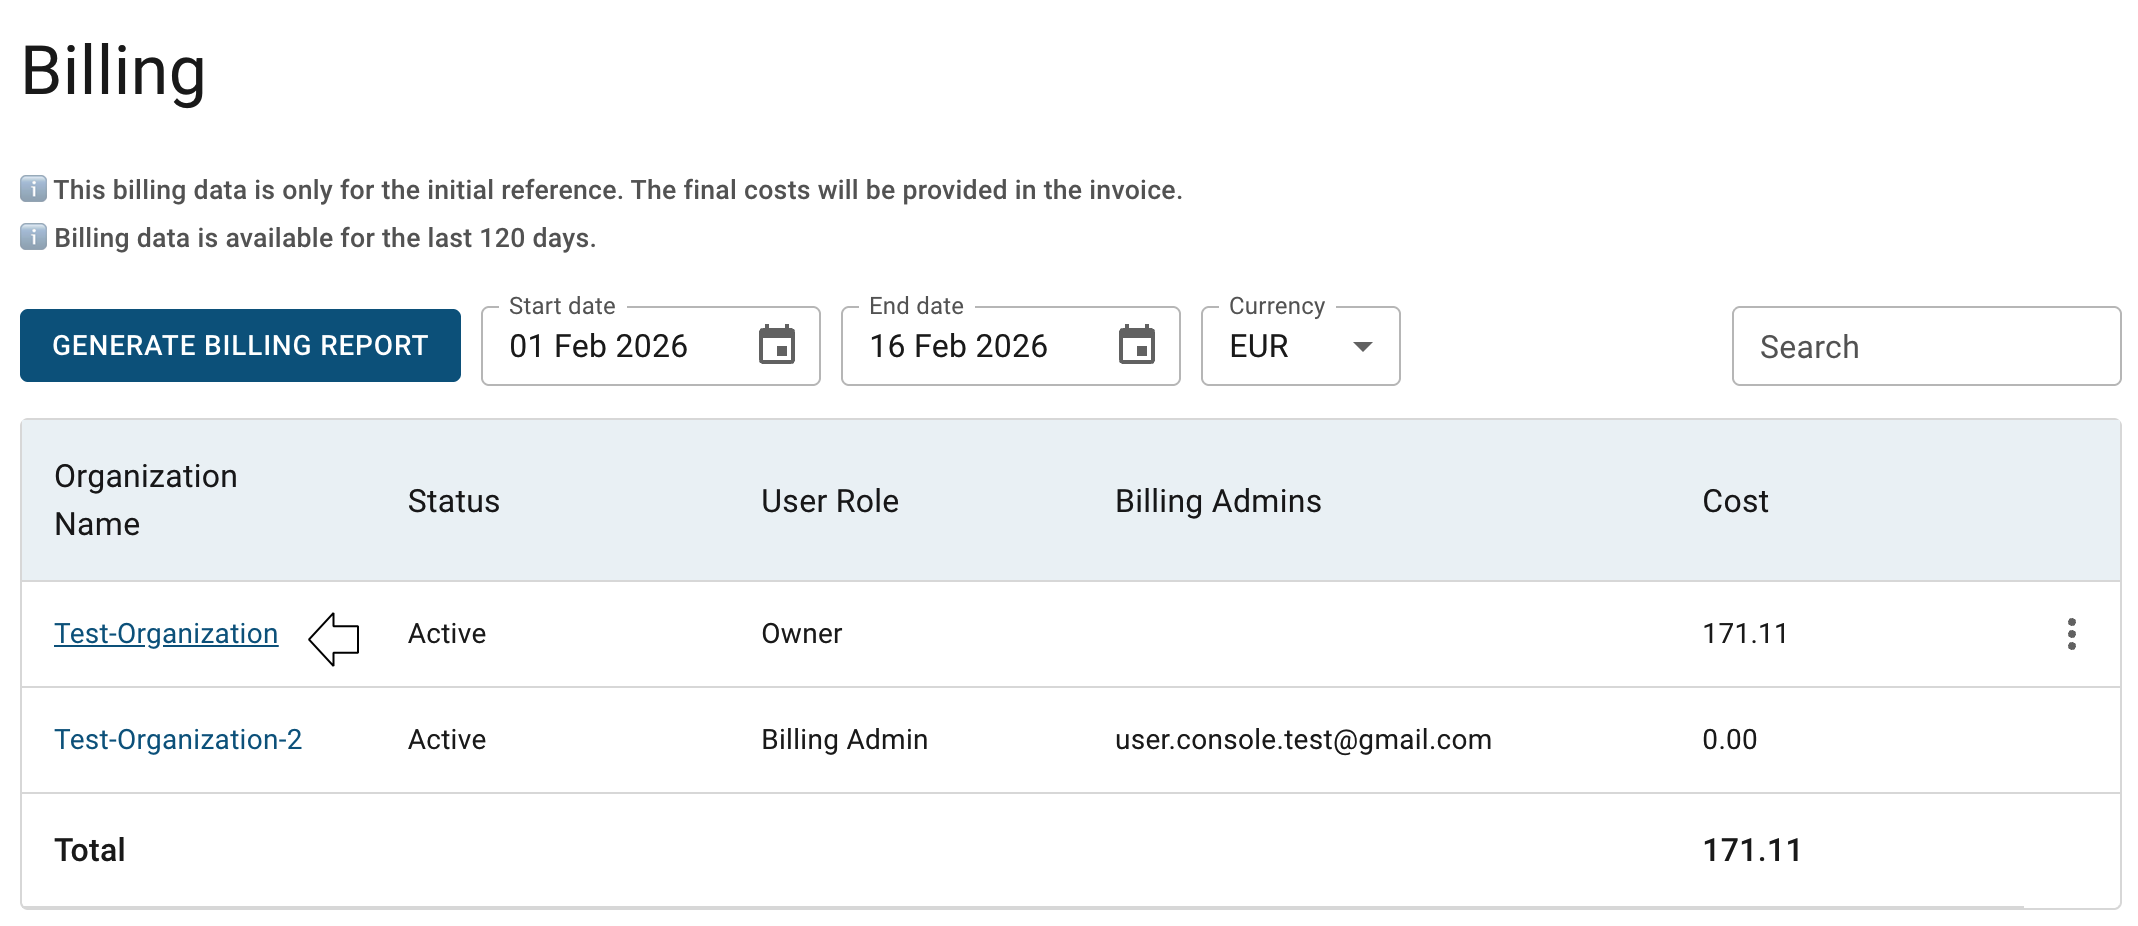
After completing these steps, the updated list of Billing Administrators will appear in the table on the User Billing page. All listed users will have access to the Organization’s billing information and will be able to navigate to the Organization Billing Overview page by clicking on the appropriate Organization name:
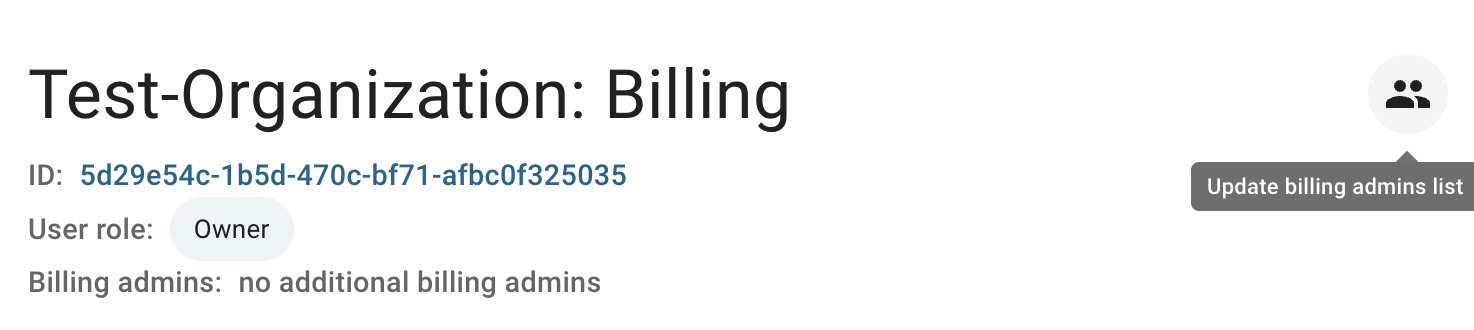
Also, you can update the Billing Administrator list directly from the Organization Billing Overview page by clicking on the corresponding quick actions icon there:
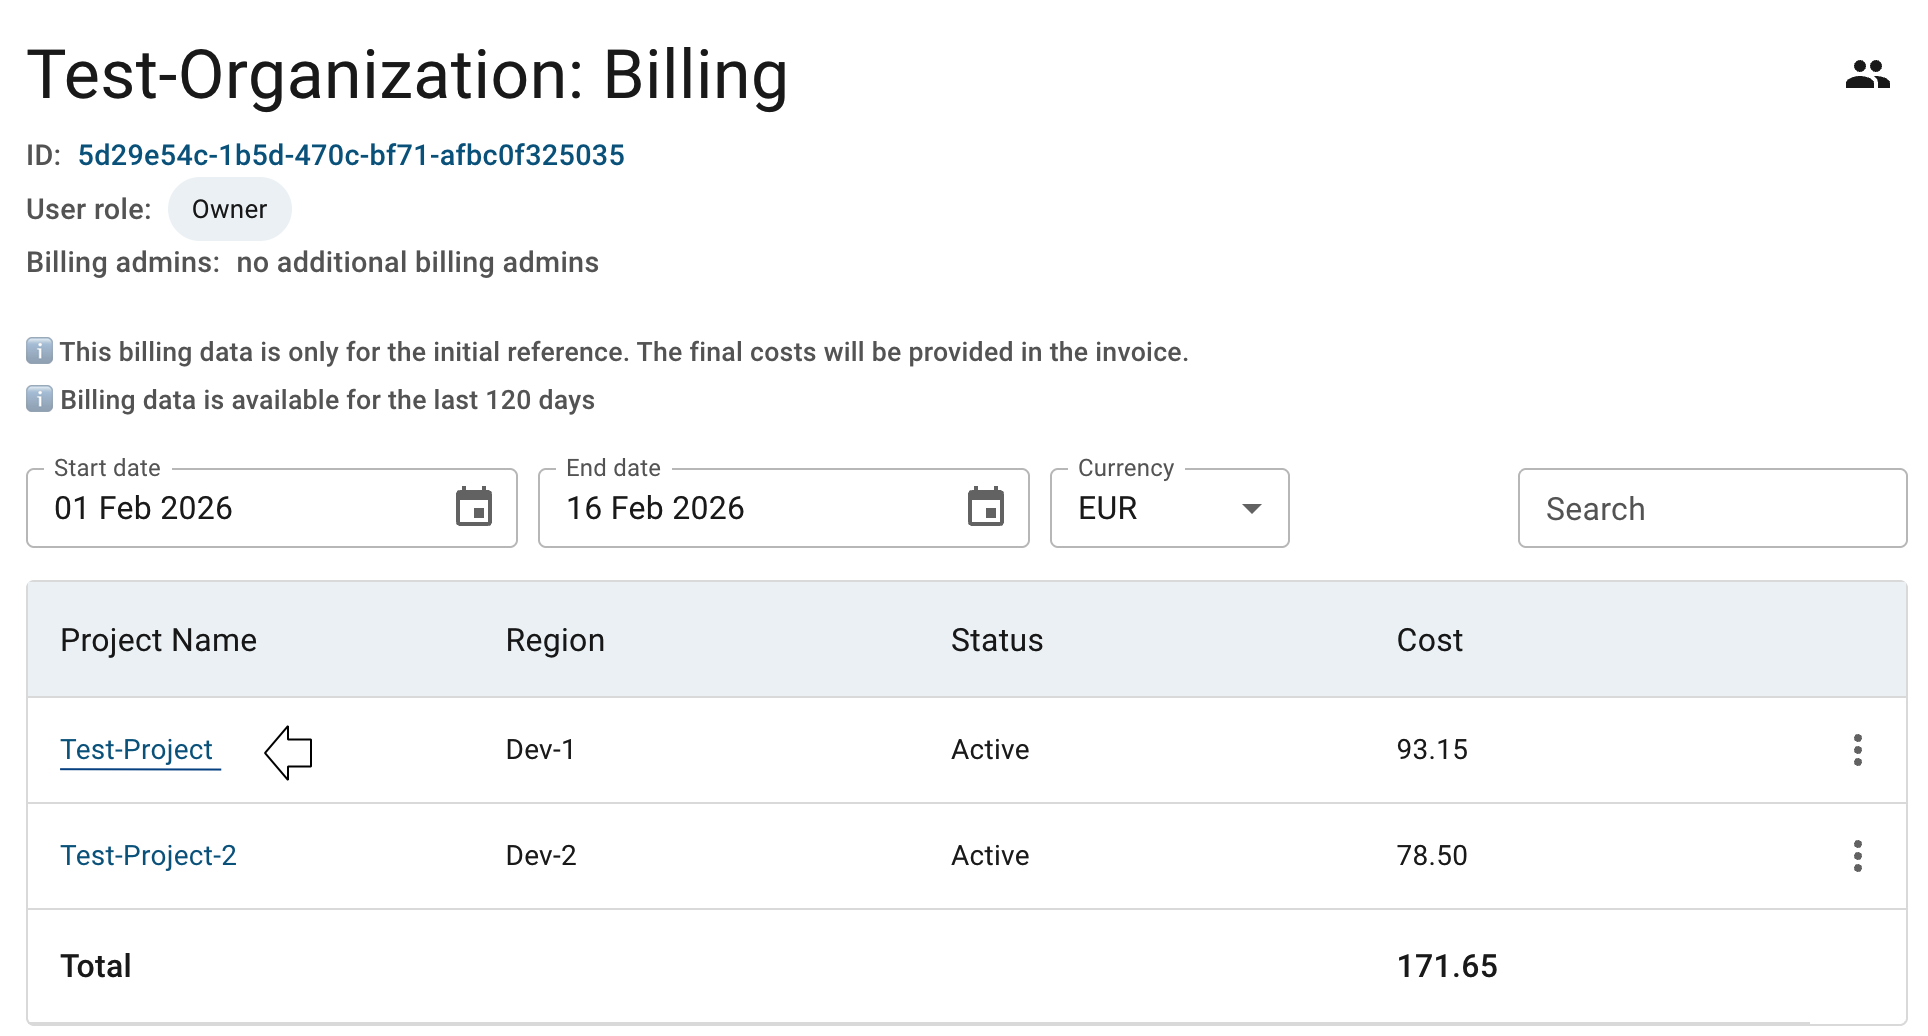
Organization Billing Overview Page
To open the Organization Billing Overview page, click on the name of the appropriate Organization on the User Billing page:
This action will redirect you to the Organization Billing Overview page, where you can find:
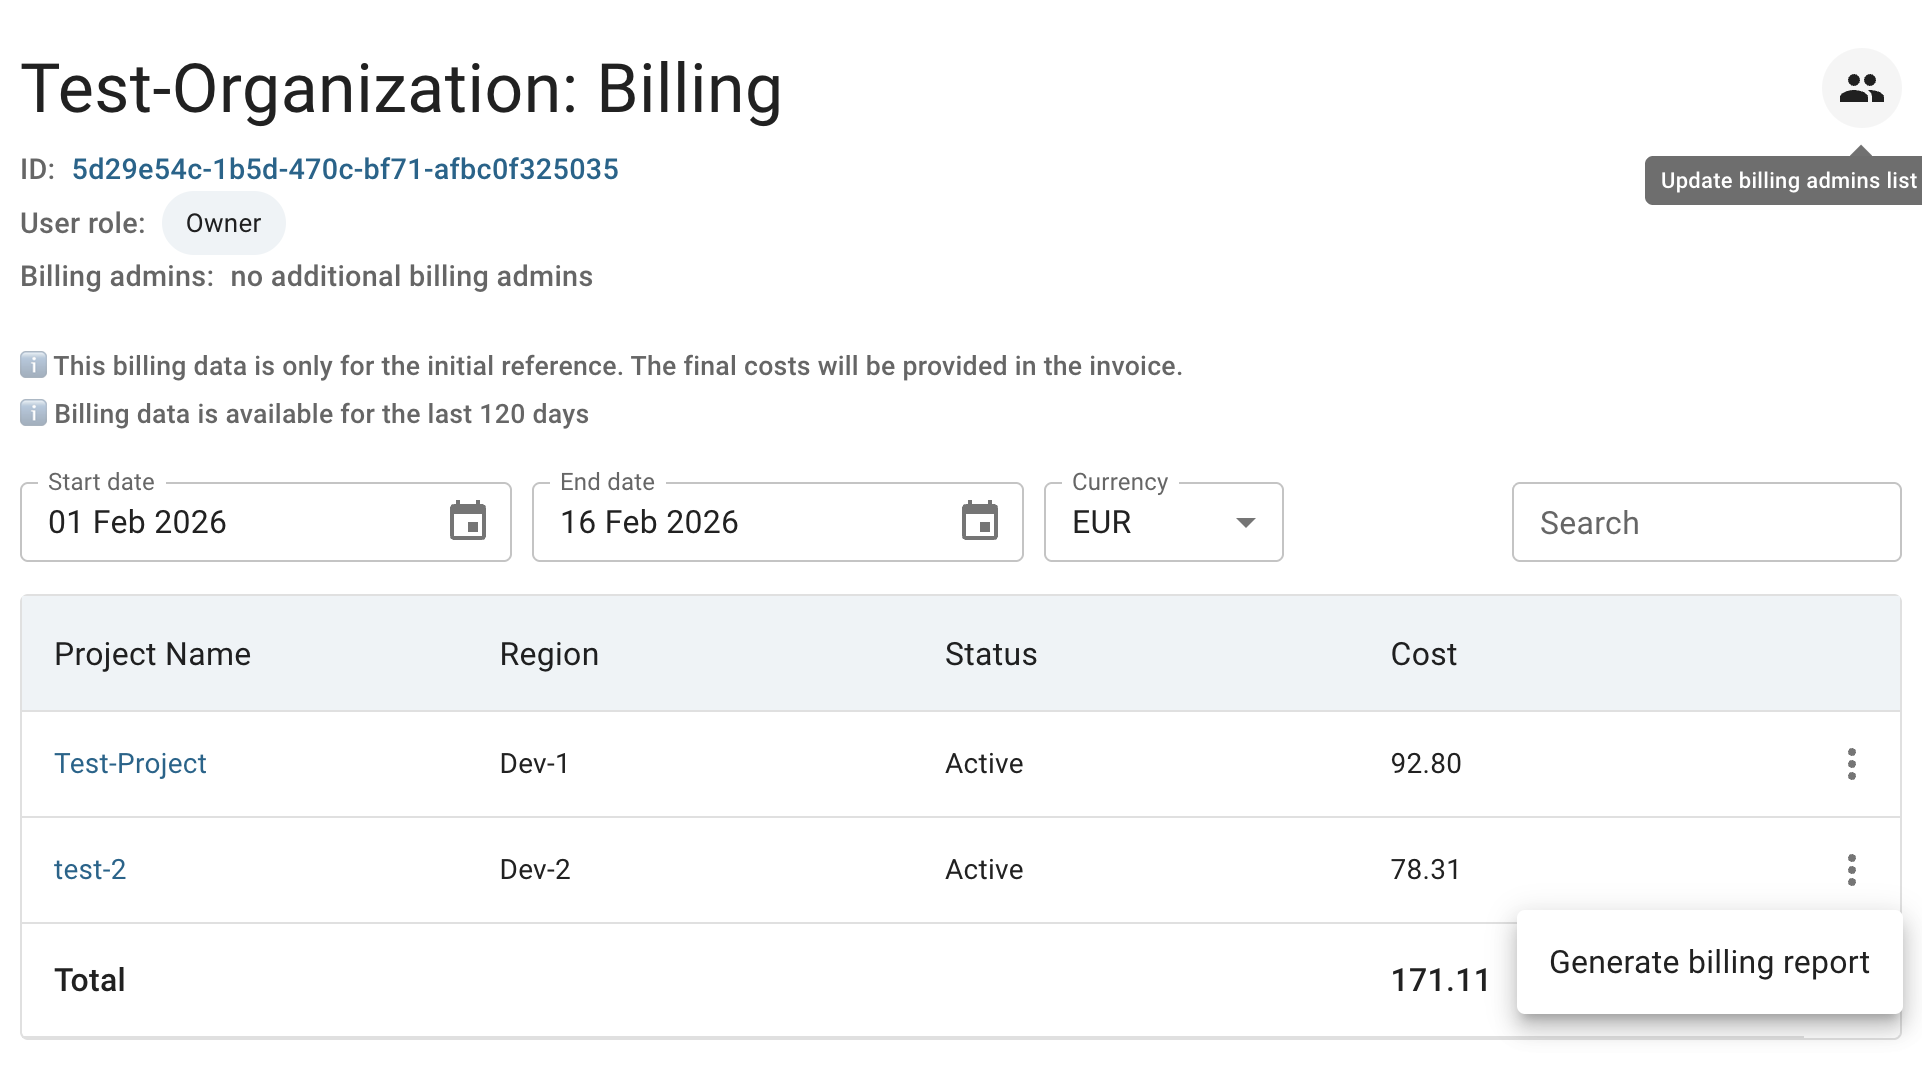
- Organization details section, containing general information such as the organization ID, its owner, and assigned billing administrators;
- Quick action panel, including the Update billing admins list option (available only to organization owner);
- Filters and controls, including billing period selection, currency switcher, and search;
- Projects billing table, displaying all projects within the Organization, their billing information, and action to generate billing report for each Project:
Additionally, from this page, you can navigate to the Project Billing Overview page by clicking on the appropriate Project name.
More detailed information about this page can be found in the sections below.
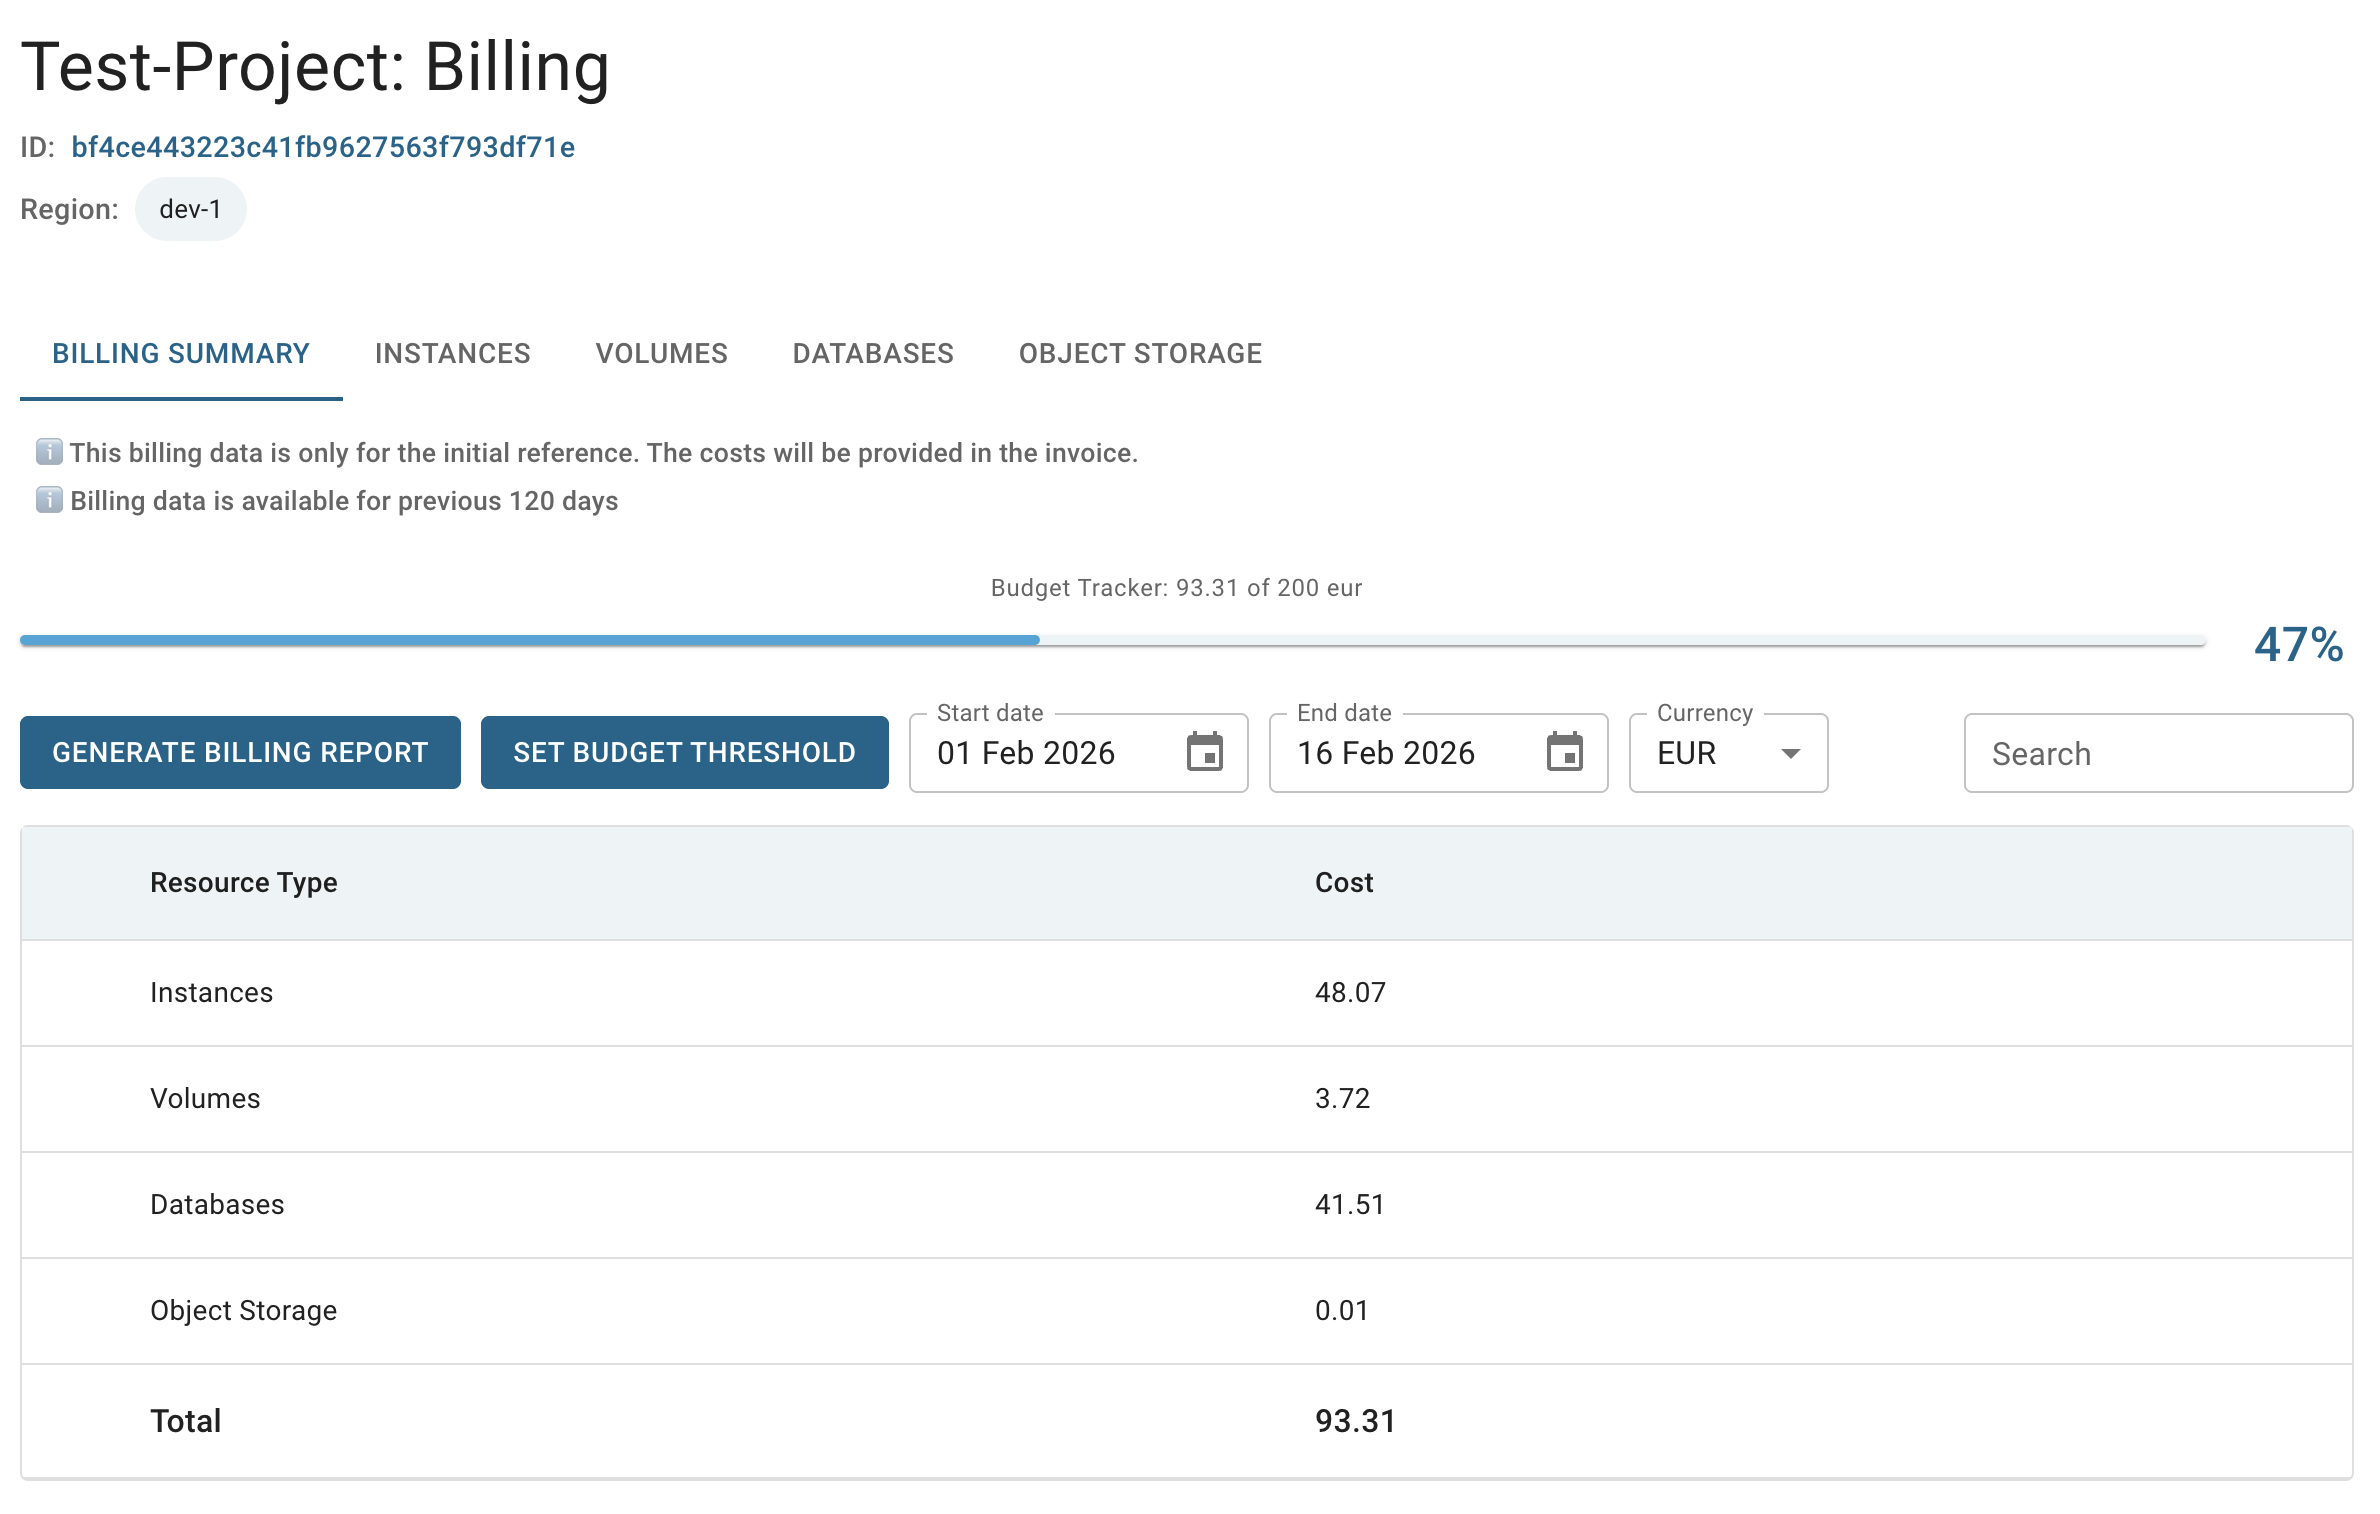
Project Billing Overview Page
To open the Project Billing Overview page, click on the name of the appropriate Organization on the User Billing page:
This action will redirect you to the Project Billing Overview page, where you can find:
- Project details section, containing general information such as the Project ID and its region;
- Navigating Billing tabs, allowing you to navigate between different resource types (e.g., Instances, Volumes, Object Storage, etc.);
- Budget tracker, displaying the current usage against the configured budget (visible only if a budget threshold is set for the Project);
- Actions panel, including options such as Generate billing report and Set budget threshold;
- Filters and controls, including billing period selection, currency switcher, and search;
- Billing summary table, providing a breakdown of costs per resource type, along with the total cost.
Generate Detailed Billing Report
To generate a detailed billing report for the specific Project follow these steps:
- go to the Project Billing Overview page and click the GENERATE BILLING REPORT button;
- click the GENERATE BILLING REPORT button, select the desired billing period on the next opened Generate billing report window and click the DOWNLOAD button:

After completing these steps, the generated report will be automatically downloaded to your device.
This report provides a detailed, project-level breakdown of costs by resource type, including instances, volumes, object storage, and other available components.
Also, you can generate a detailed billing report for a specific Project directly from the Organization Billing Overview page by clicking the actions icon and selecting the Generate billing report option for the corresponding Project:

Set Budget Threshold
In Cloud Console you can configure a monthly budget tracker for your Project to monitor and control cloud resource consumption. Once the budget reaches 80% of the set limit, the subscribed Administrators of your Organization will receive daily email notifications informing them that the budget is nearly exhausted.
Only billing administrators or owner can configure the monthly budget tracker.
Likewise, only billing administrators or owner can be subscribed to receive budget alerts.
To set a budget limit, follow these steps:
- go to the Project Billing Overview page and click the SET BUDGES THRESHOLD button:
- fill in the form on the next opened Set Budget Threshold window and click on the SET button:
- Budget limit amount: enter the monthly budget limit amount, which will trigger daily alerts once 80% of the limit is reached;
- Subscribers: select who will receive budget alerts from the list of Organization Administrators and the Owner — these users will be notified when the budget threshold is reached.

Once the budget limit is set, a Budget Tracker will be displayed on the page, allowing Administrators to monitor the project’s monthly consumption in real time.
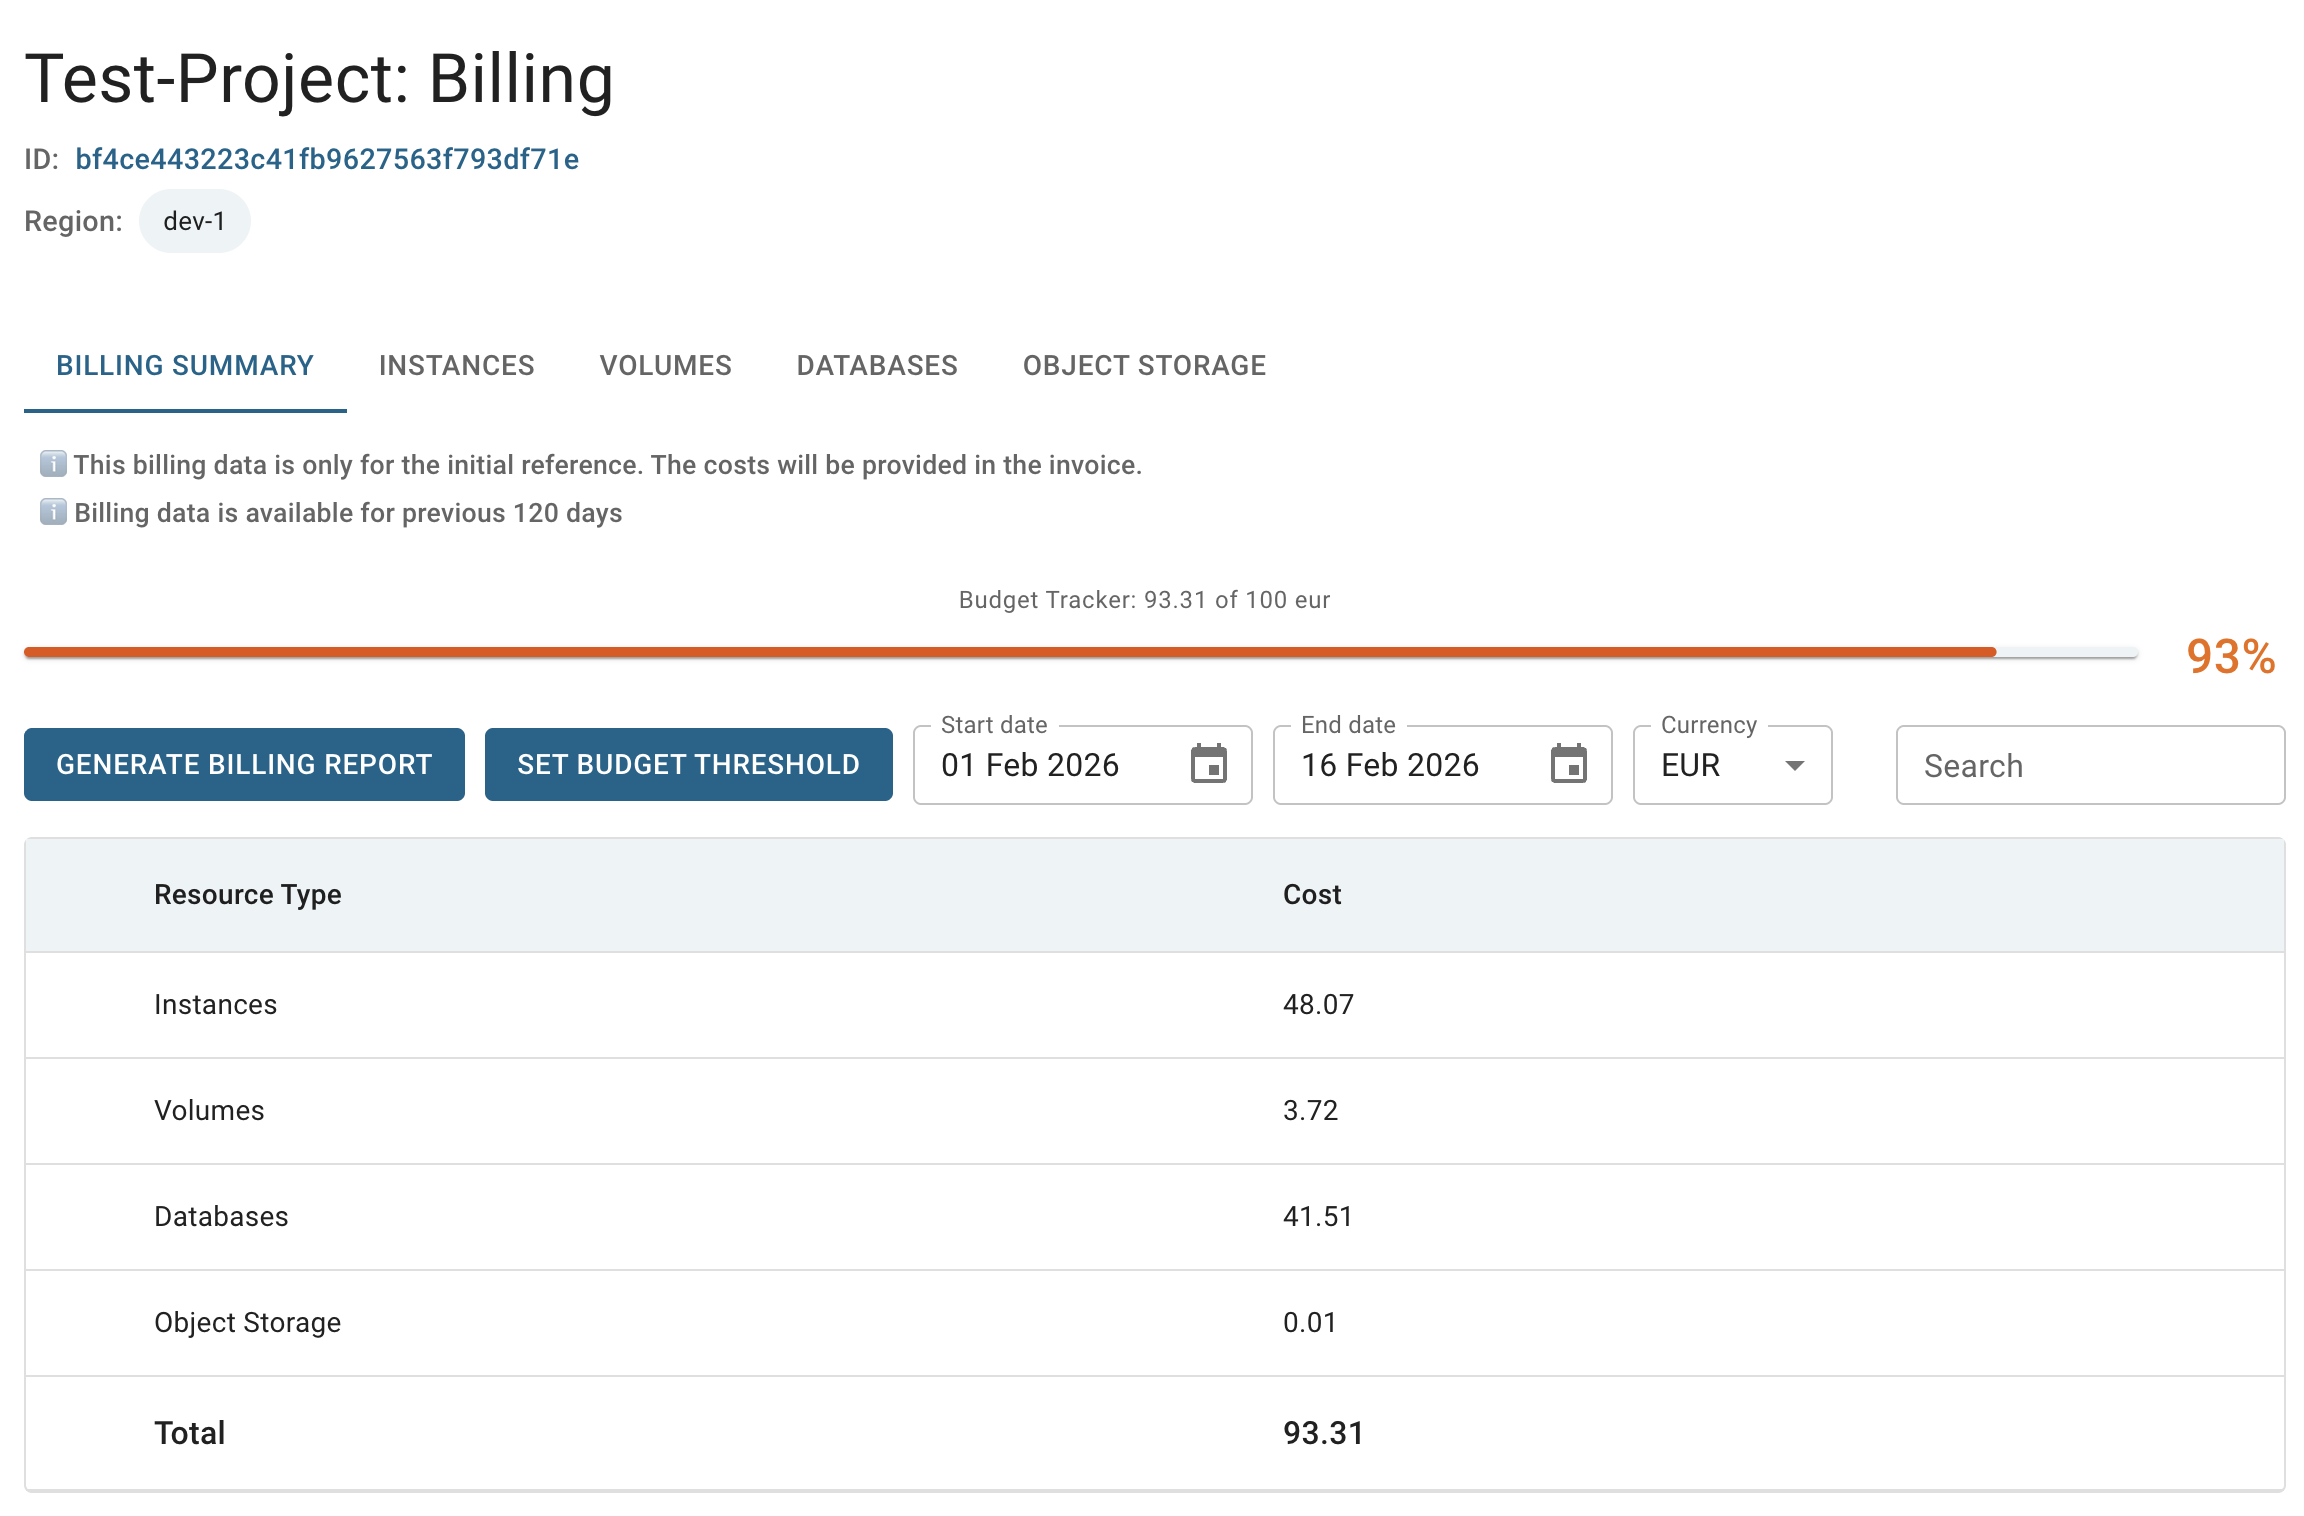
If you wish to disable the budget threshold, hide the Budget Tracker, and stop all budget alerts, set the Budget Limit Amount to 0.