Snapshots
On this page, you can find an explanation of how to create, edit, delete Snapshots and how to create Volumes from the Snapshots in the Cloud Console.
Table of contents
Snapshots page
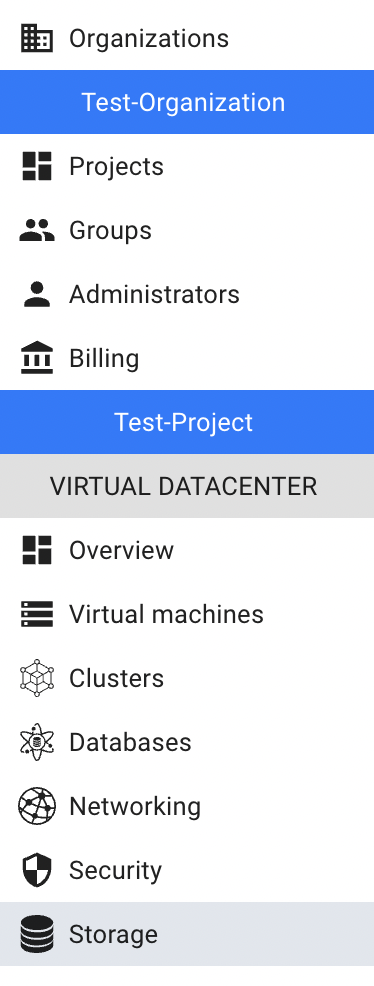
To get to the Snapshots page, select Block Storage from the VIRTUAL DATACENTER block in the side-bar menu and click the Snapshots TAB:

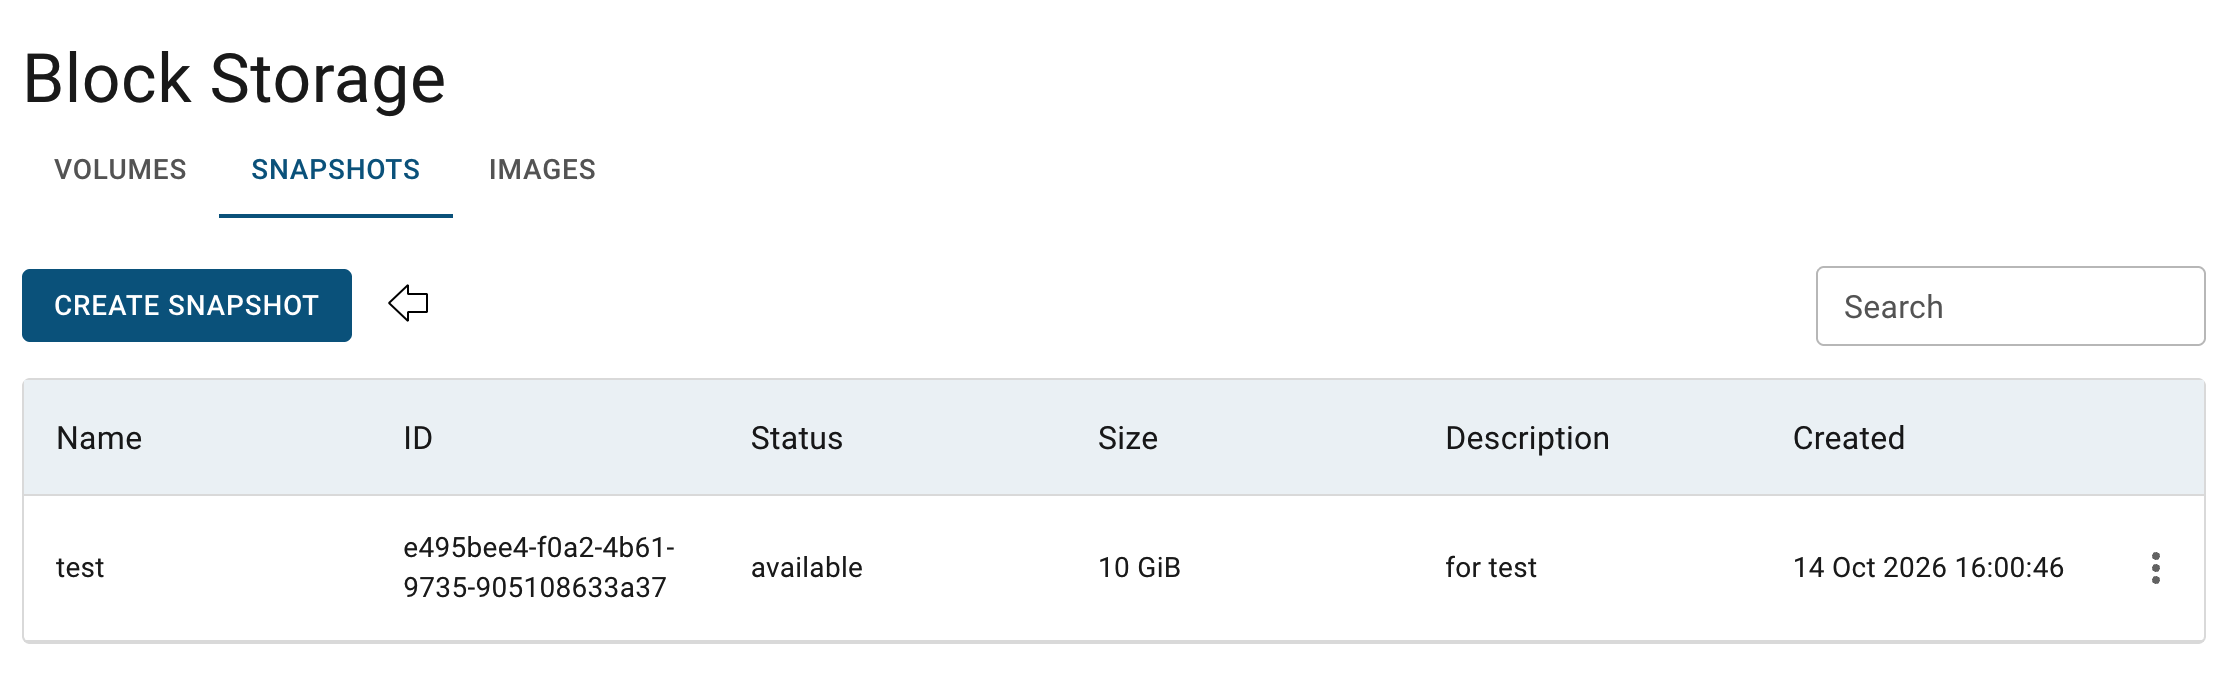
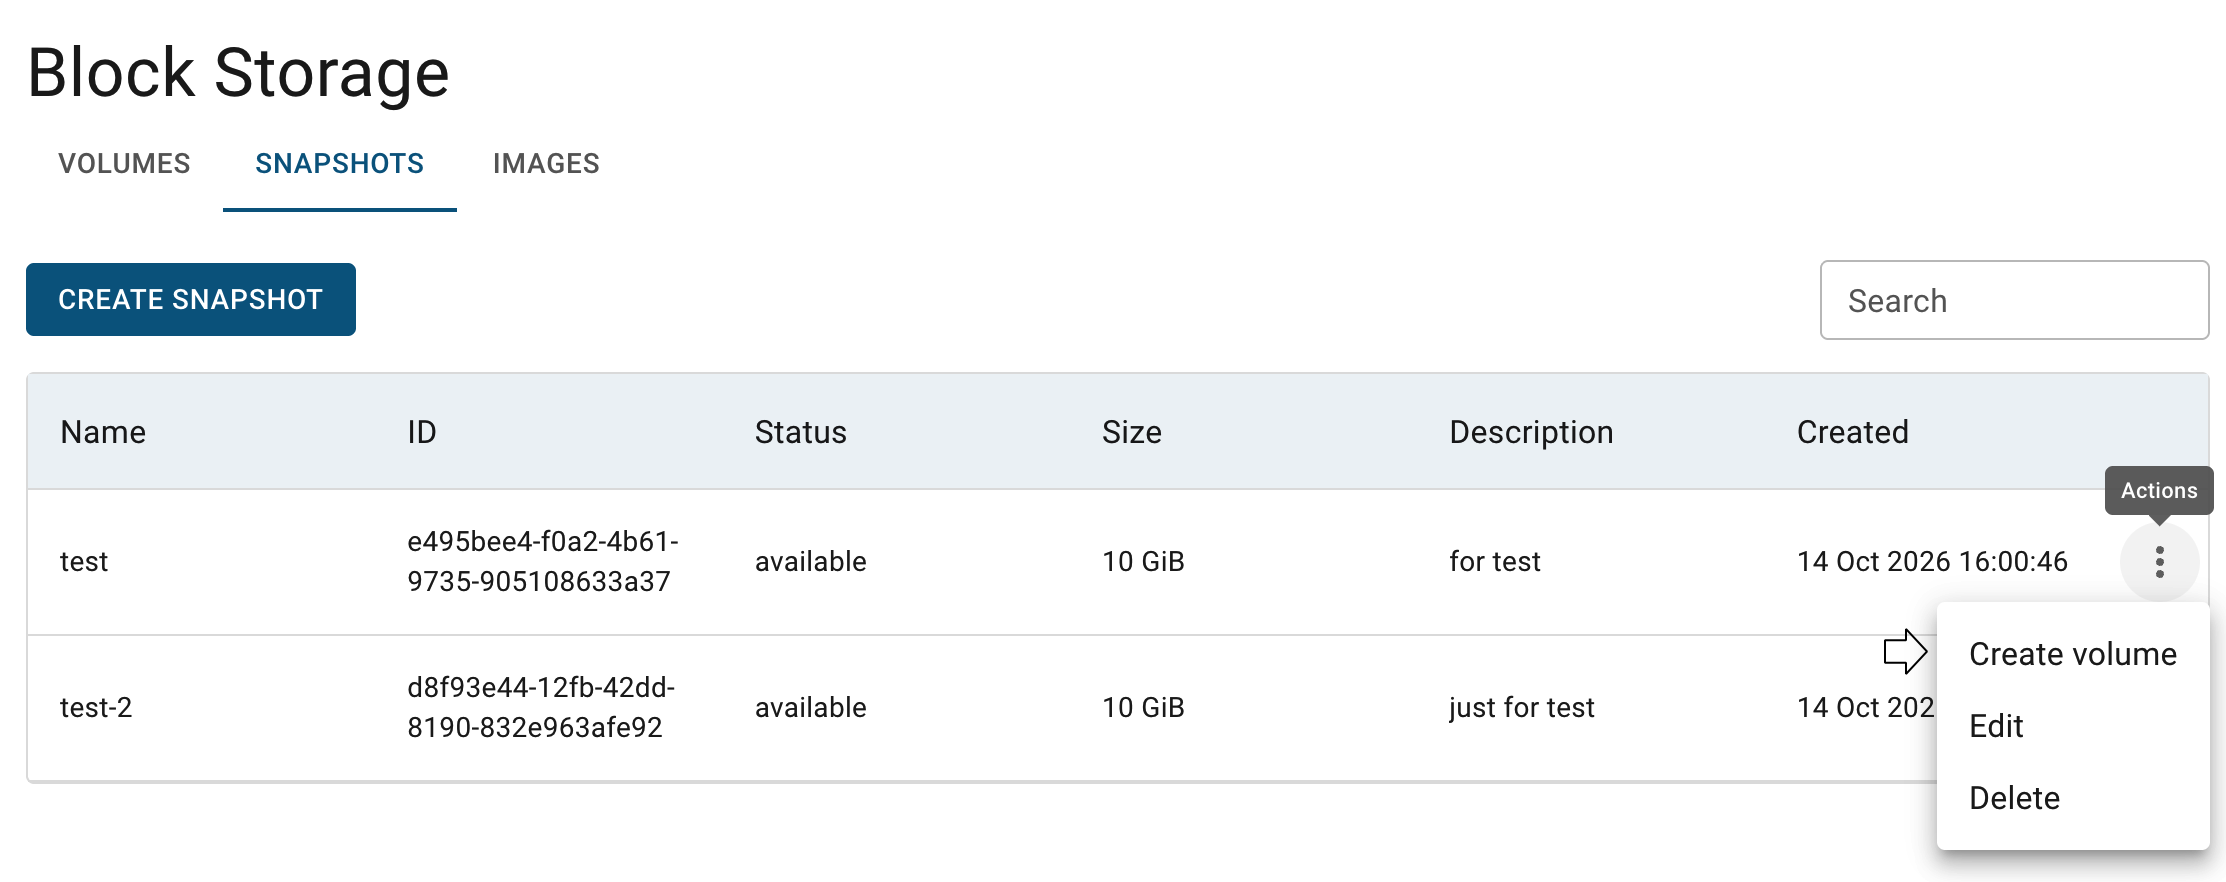
On this page you can find all created Snapshots with the Create button, Search bar and Actions icon, which opens a list of available management actions for the selected Snapshot:
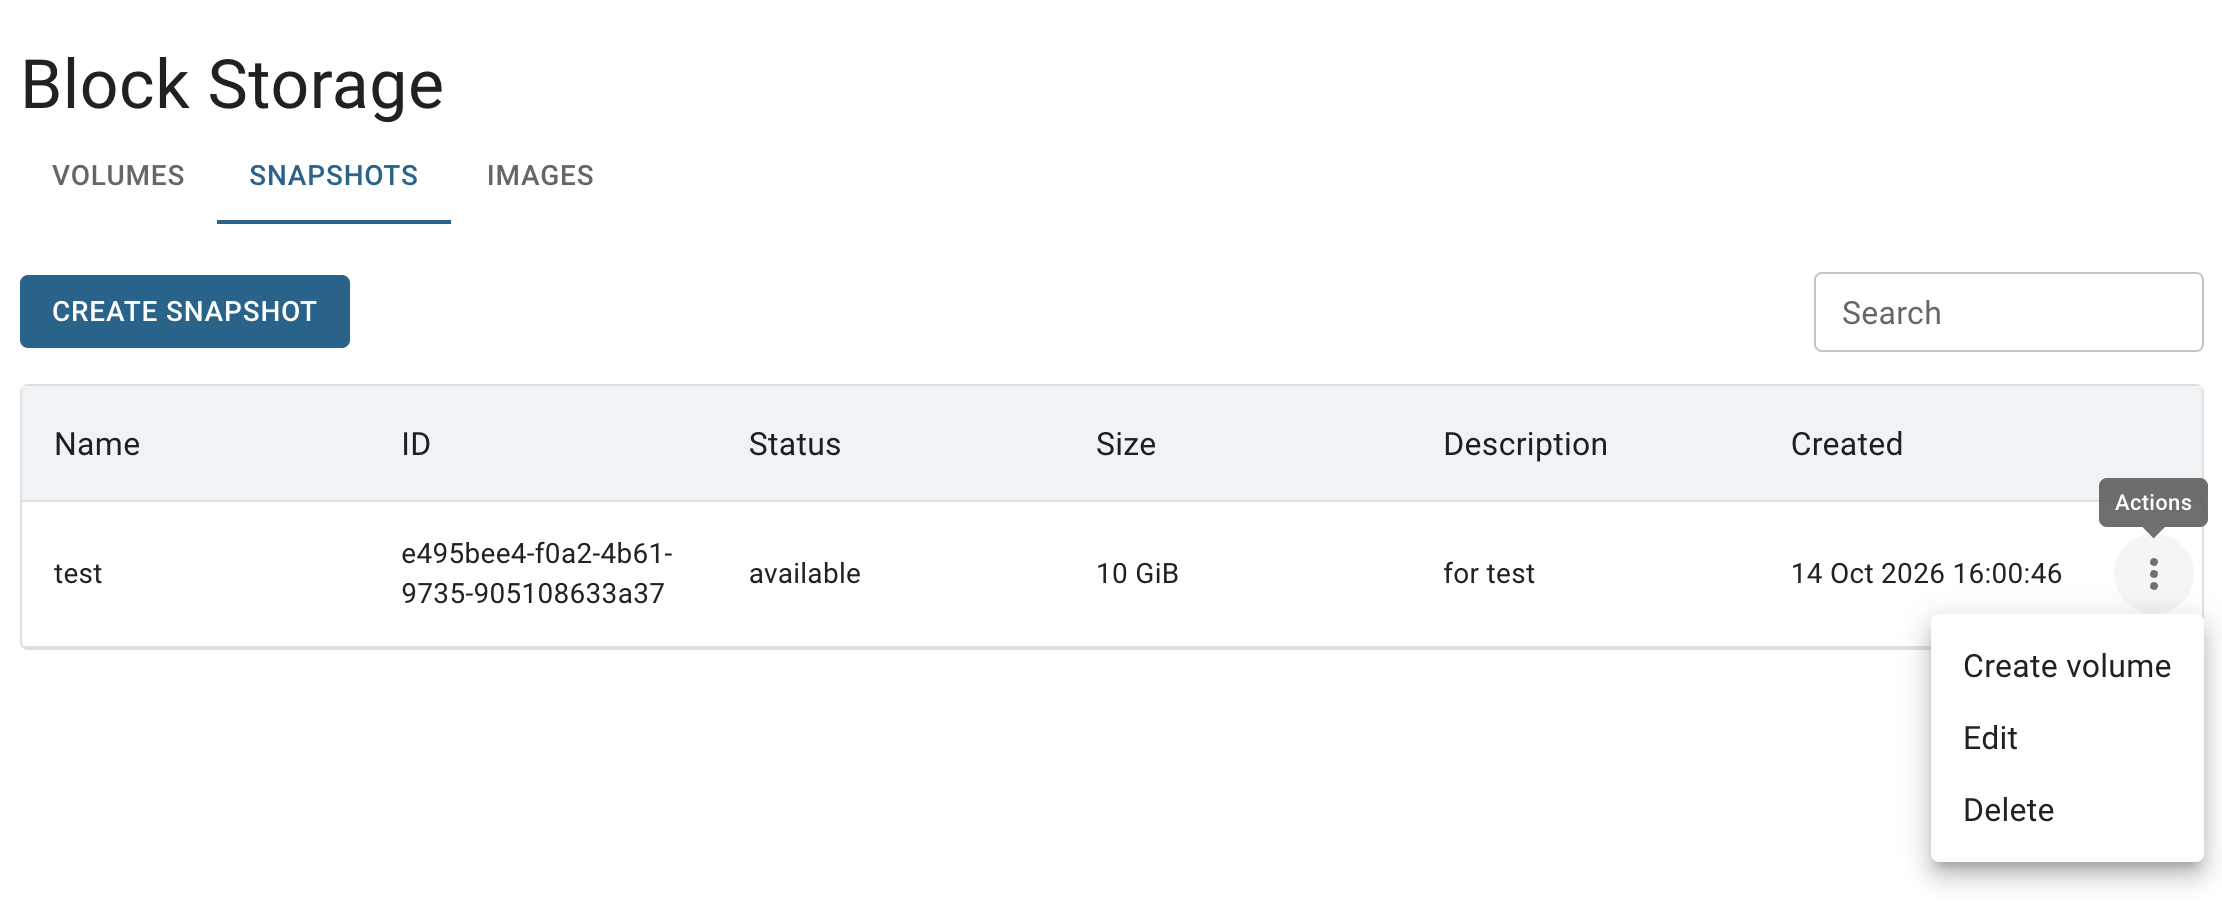
Actions icon opens the next list of available management actions:
- Create volume - this option is used to create a Volume from the selected Snapshot;
- Edit - this option is used to change Name and/or Description of the selected Snapshot;
- Delete - this option is for the Snapshot removing.
There are two ways to create, edit and delete Snapshots:
- from the SNAPSHOTS TAB on the Block Storage page;
- from the SNAPSHOTS TAB on the Virtual Machine details page.
In this article we will explain the first way - to manage Snapshots from the SNAPSHOTS TAB on the Block Storage page. Information about the second one you can find in the next article - VM’s Snapshots.
Create Snapshot
To create a new Snapshot from the SNAPSHOTS TAB on the Block Storage page, do the following:
- go to the SNAPSHOTS TAB on the Block Storage page and click the CREATE SNAPSHOT icon in the upper left corner;
- fill in the form on the next opened Create Snapshot window and click on the CREATE icon:
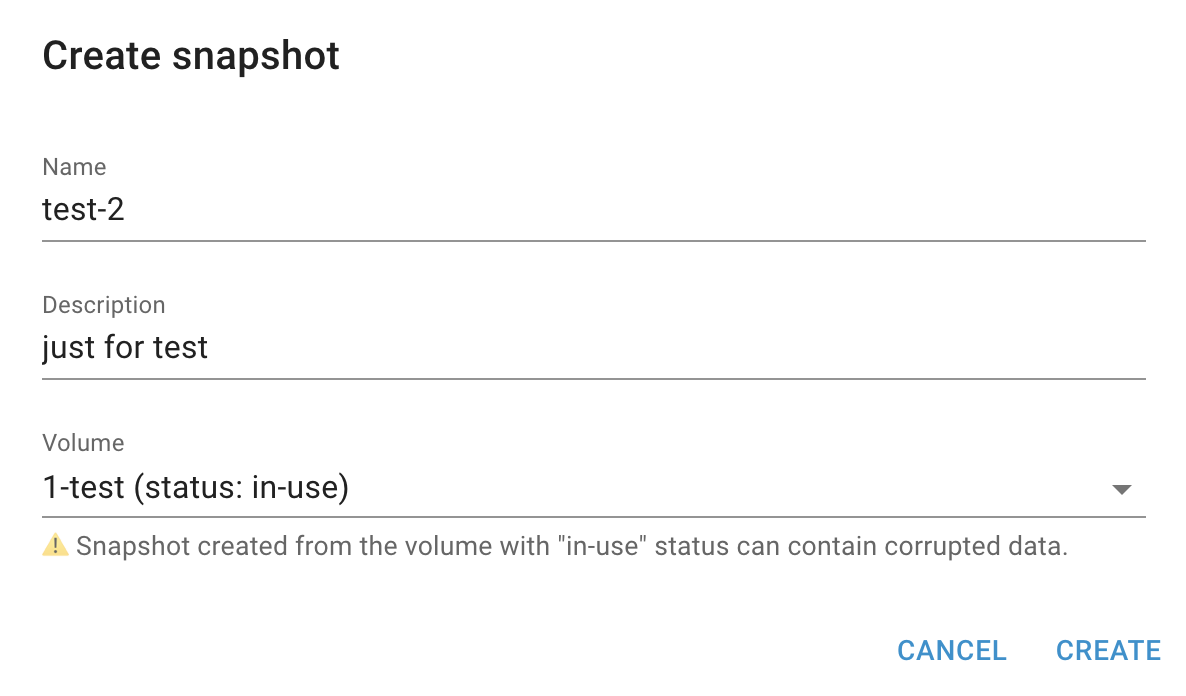
- Name - set a name for the Snapshot;
- Description - set a description for the Snapshot;
- Volume - select volume from what you want to create a Snapshot.
Snapshot, created from the volume with “in-use”, status can contain corrupted data.
After these steps, the newly created Snapshot will be added to the Snapshots page:
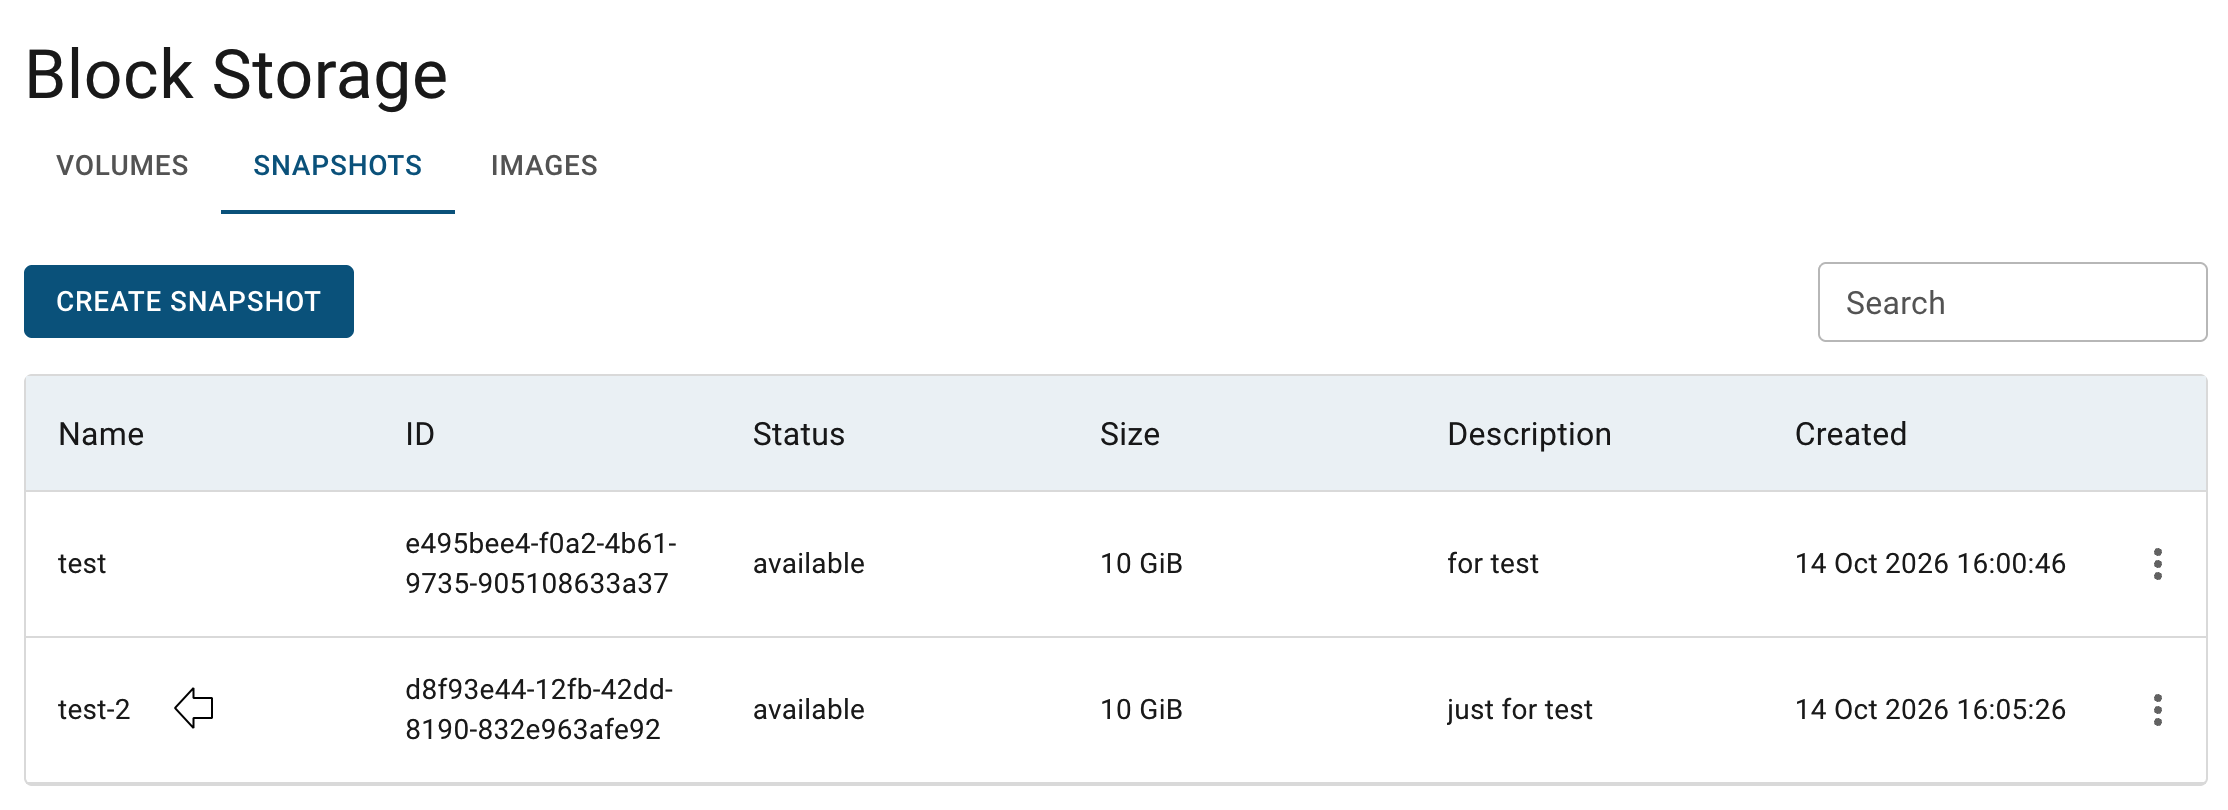
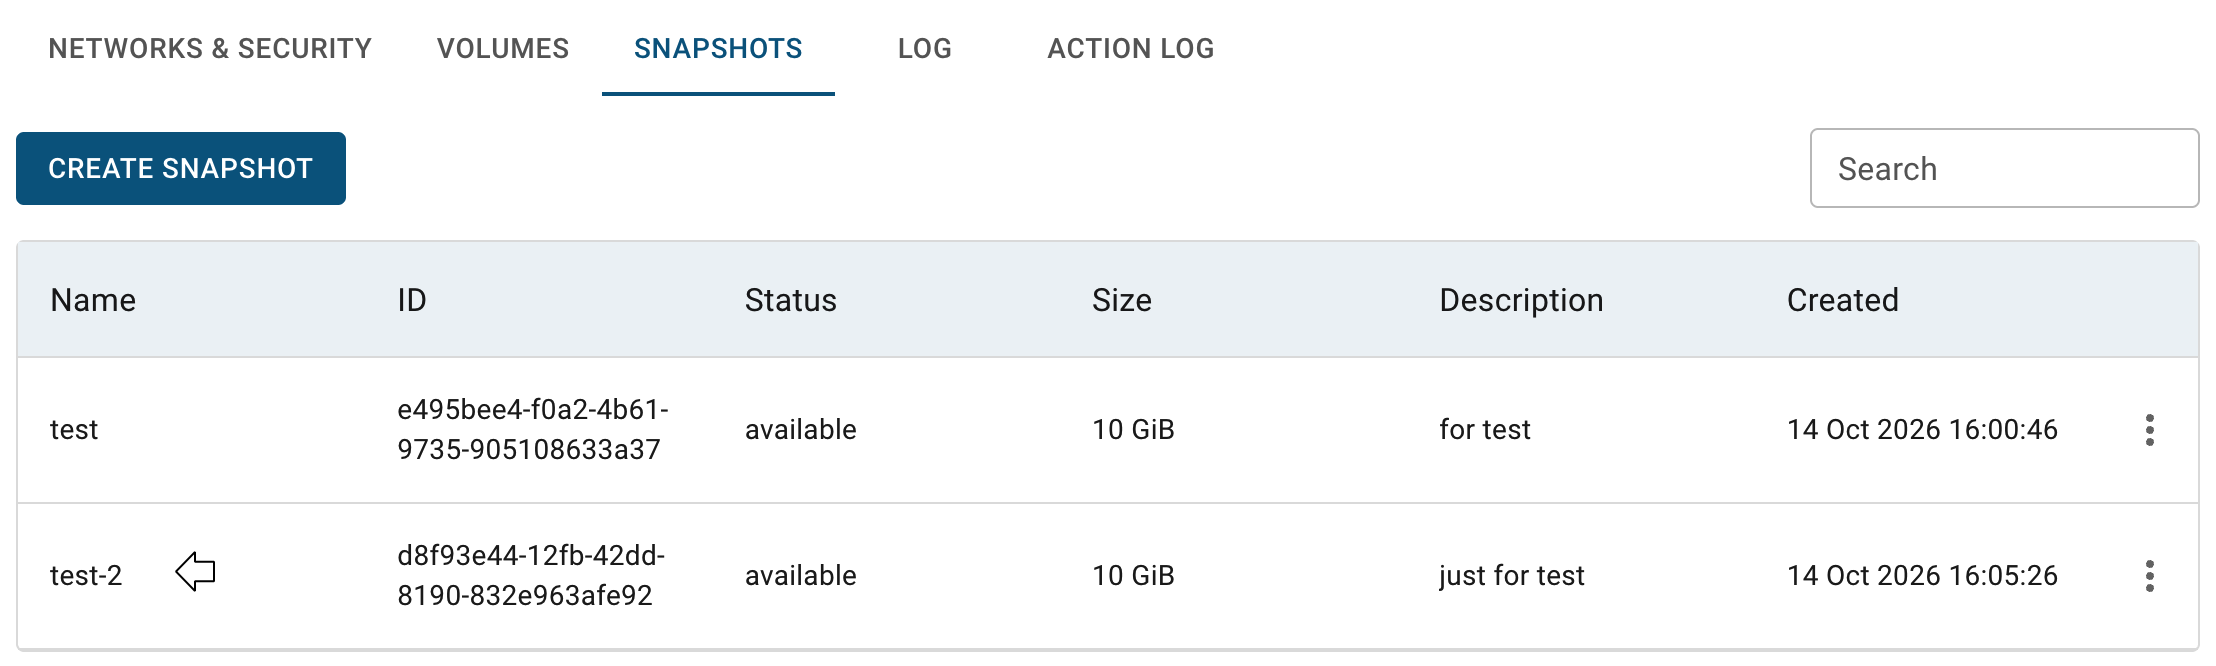
Now, if you attach the Volume, from which this Snapshot was created, to the Virtual Machine - this Snapshot will be displayed on the SNAPSHOTS TAB on this Virtual Machine details page:
Also, new Snapshot can be created from the SNAPSHOTS TAB on the Virtual Machine details page, how to do this, please, see the article - VM’s Snapshots.
Create Volume from Snapshot
To create a Volume from the selected Snapshot, do the following:
- identify the Snapshot from which you want to create a Volume on the SNAPSHOTS TAB of the Block Storage page;
- click on the Actions icon and select the Create volume in the list of available options;
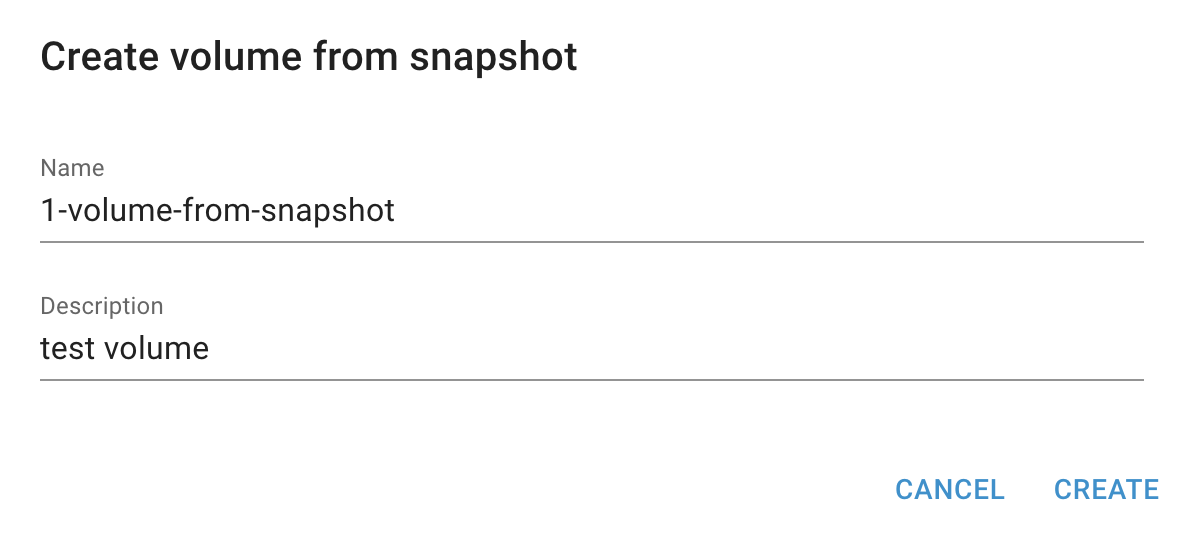
- fill in the form on the next opened Create volume from snapshot window and click on the CREATE icon:
- Name - set a name for the Volume;
- Description - set a description for the Volume.
After these steps, the newly created Volume will be added to the VOLUMES TAB of the Block Storage page with the status available:
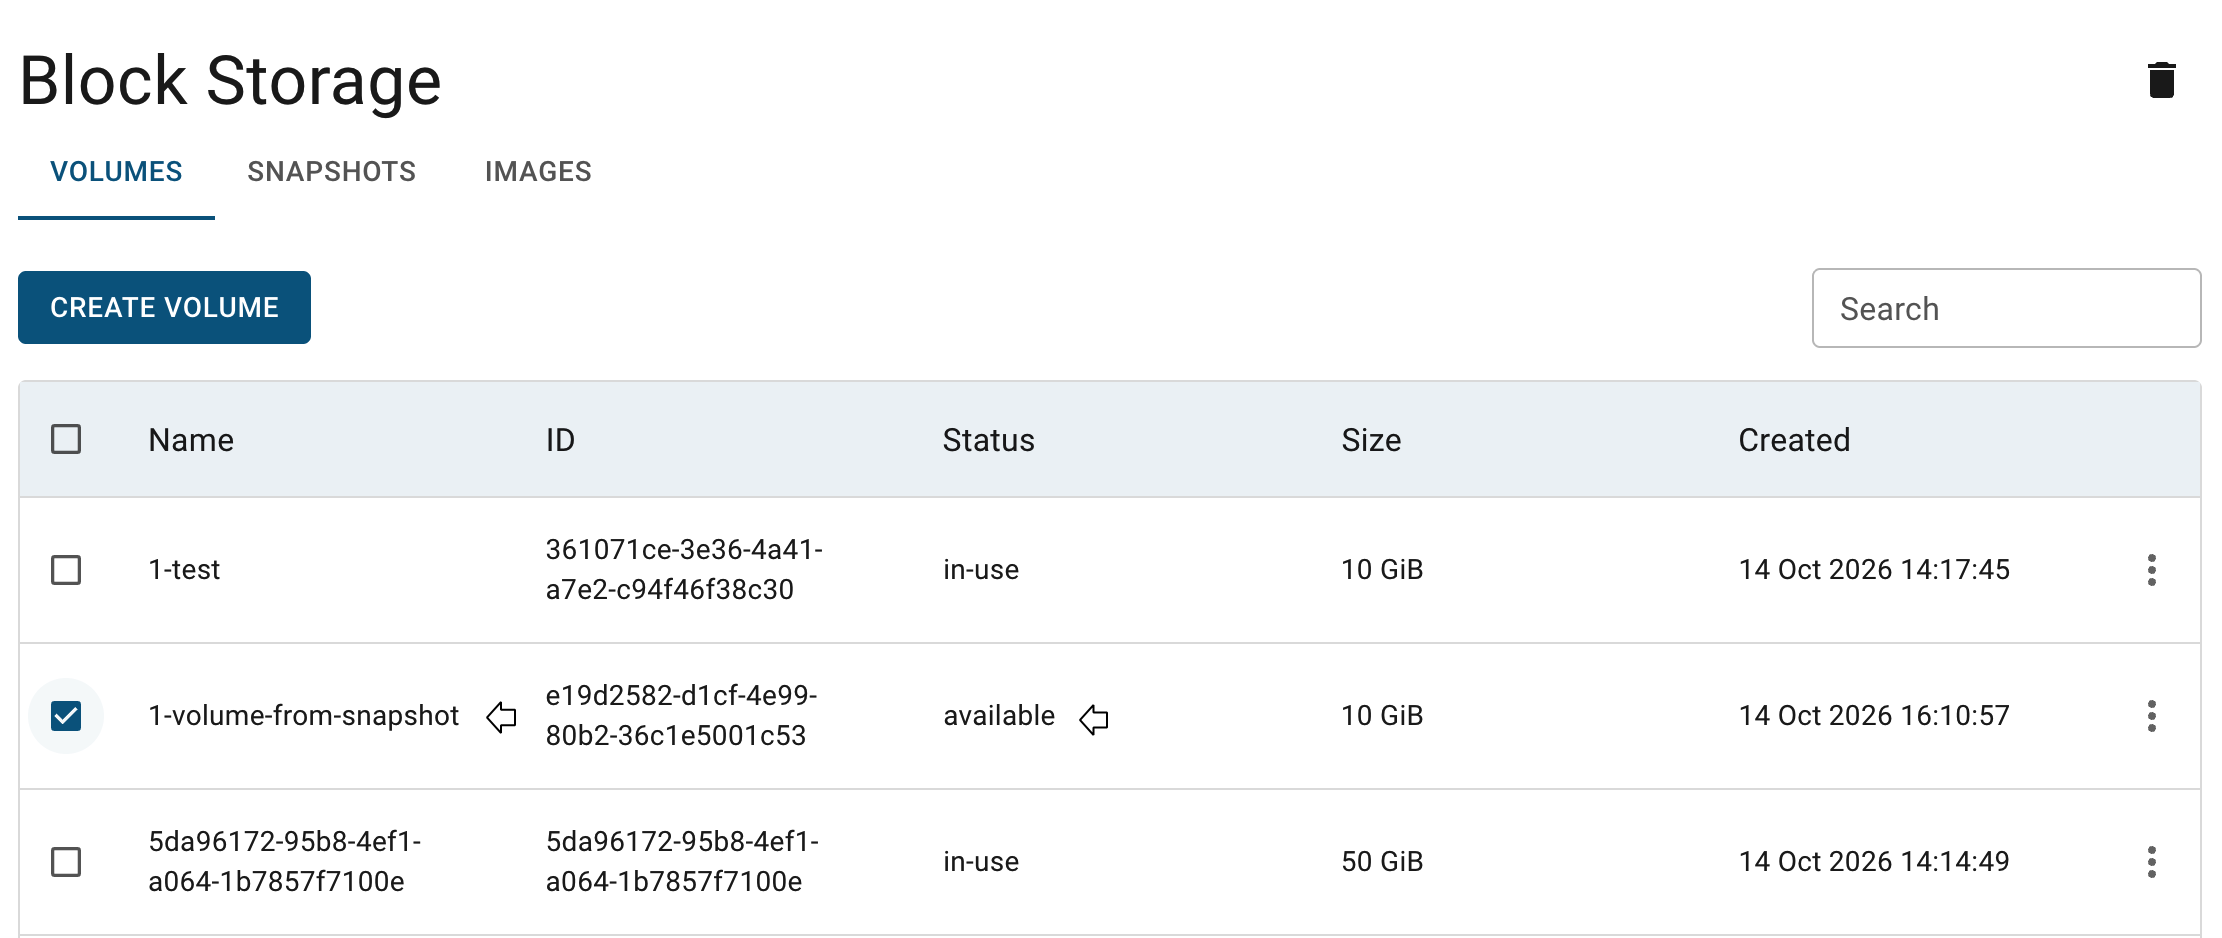
How to manage Volumes, you can find in the next articles: Volumes, VM’s Volumes.
Create VM from Snapshot
To create Virtual Machine from Snapshot do the following:
- open the Virtual Machines page - select the Virtual Machines from the VIRTUAL DATACENTER block in the side-bar menu:
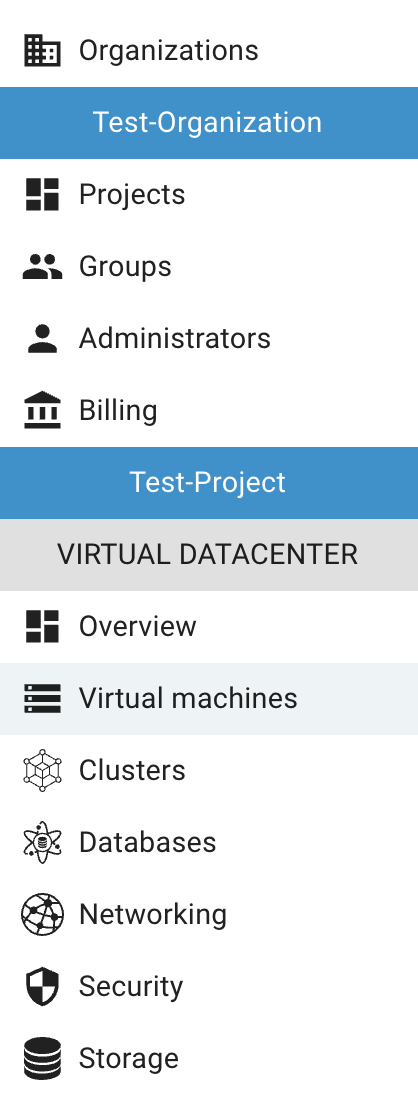
- click on the CREATE VM icon in the upper left corner of the Virtual Machines page;
- fill in the form on the next opened Create Virtual Machine window and click on the CREATE icon:
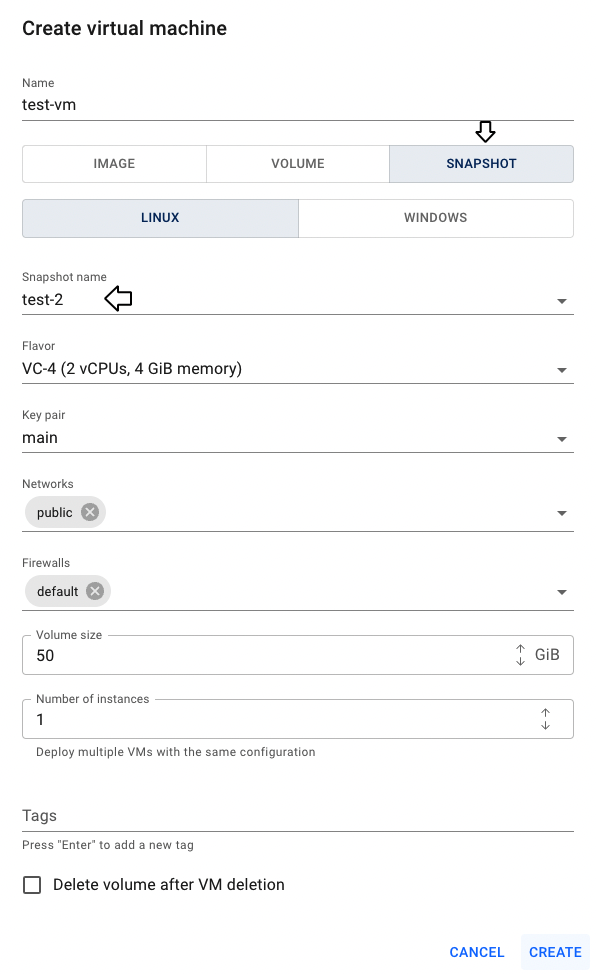
After these steps, the newly created VM will be added to the Virtual Machine page with the status ACTIVE.
To find more information about Virtual Machines and how to connect to them, please, see next articles - Virtual Machines, Access Linux VM.
Create image from Snapshot
The Cloud Console functionality allows to upload custom Images to the system, which will be available for all resources in the current Project.
To find full workflow, of creating a custom Image from Snapshot, please see the article - Create Image from Snapshot.
Edit Snapshot
To edit the Snapshot, do the following:
- identify the Snapshot that you want to edit on the SNAPSHOTS TAB of the Block Storage page;
- click on the Actions icon and select the Edit in the list of available options;
- update the Snapshot Name or/and Description on the next opened Edit Snapshot window and click on the SAVE icon.
After these steps, the selected Snapshot will be updated.
Edit Snapshot you can also from the SNAPSHOTS TAB on the Virtual Machine details page, how to do this, please, see the article - VM’s Snapshots.
Delete Snapshot
To delete the Snapshot, do the following:
- identify the unnecessary Snapshot on the SNAPSHOTS TAB of the Block Storage page;
- click on the Actions icon and select the Delete in the list of available options;
- confirm the Snapshot deletion on the next opened Confirmation window.
After these steps, the selected Snapshot will be deleted.
Delete Snapshot you can also from the SNAPSHOTS TAB on the Virtual Machine details page, how to do this, please, see the article - VM’s Snapshots.