Ports
On this page, you can find an explanation of how to create, edit, delete Port and instructions for other steps to manage Ports in the Cloud Console.
Table of contents
Ports page
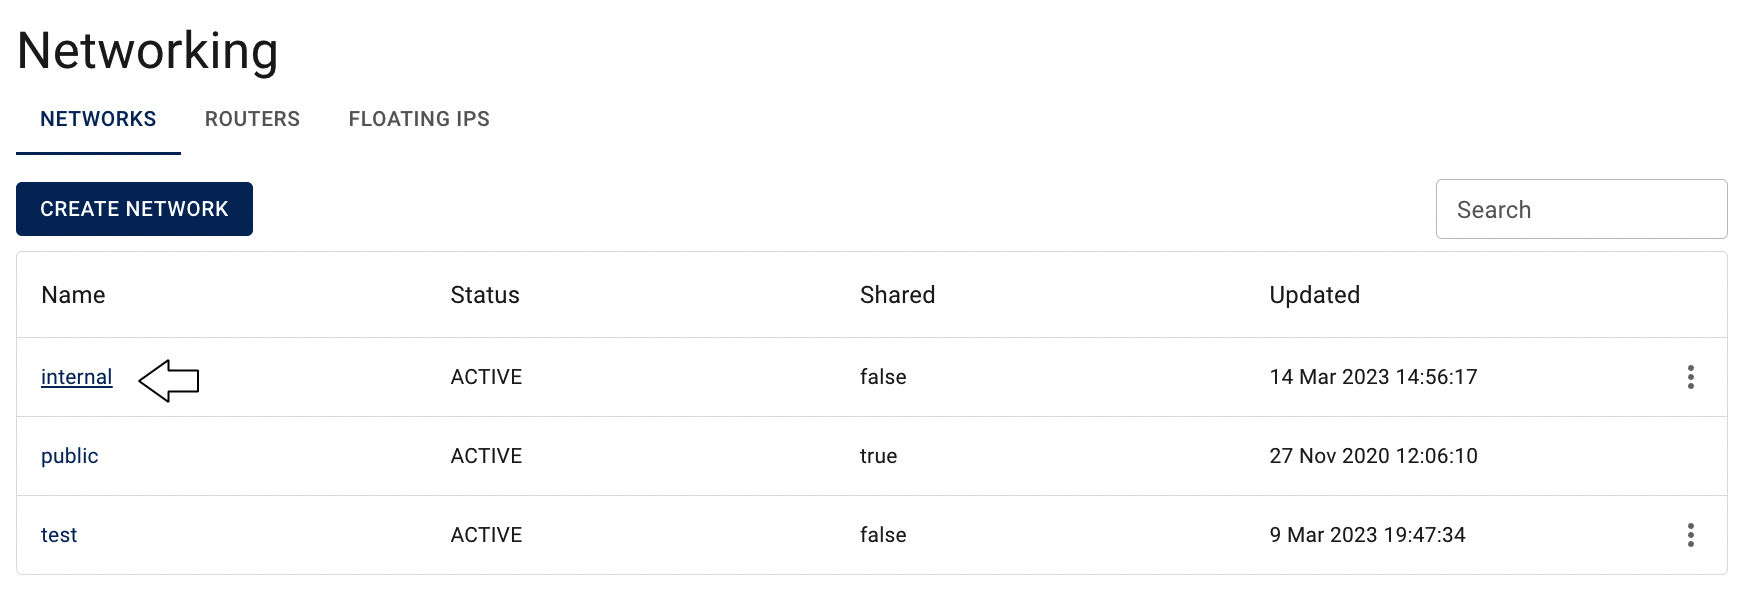
To open the Ports page, go to Networking page, click on the Name of the corresponding Network and select the Ports TAB:

On this page you can find all created Ports, related to the selected Network, with the Create button, Search bar and Actions icon, which opens a list of available management actions for the selected Port:
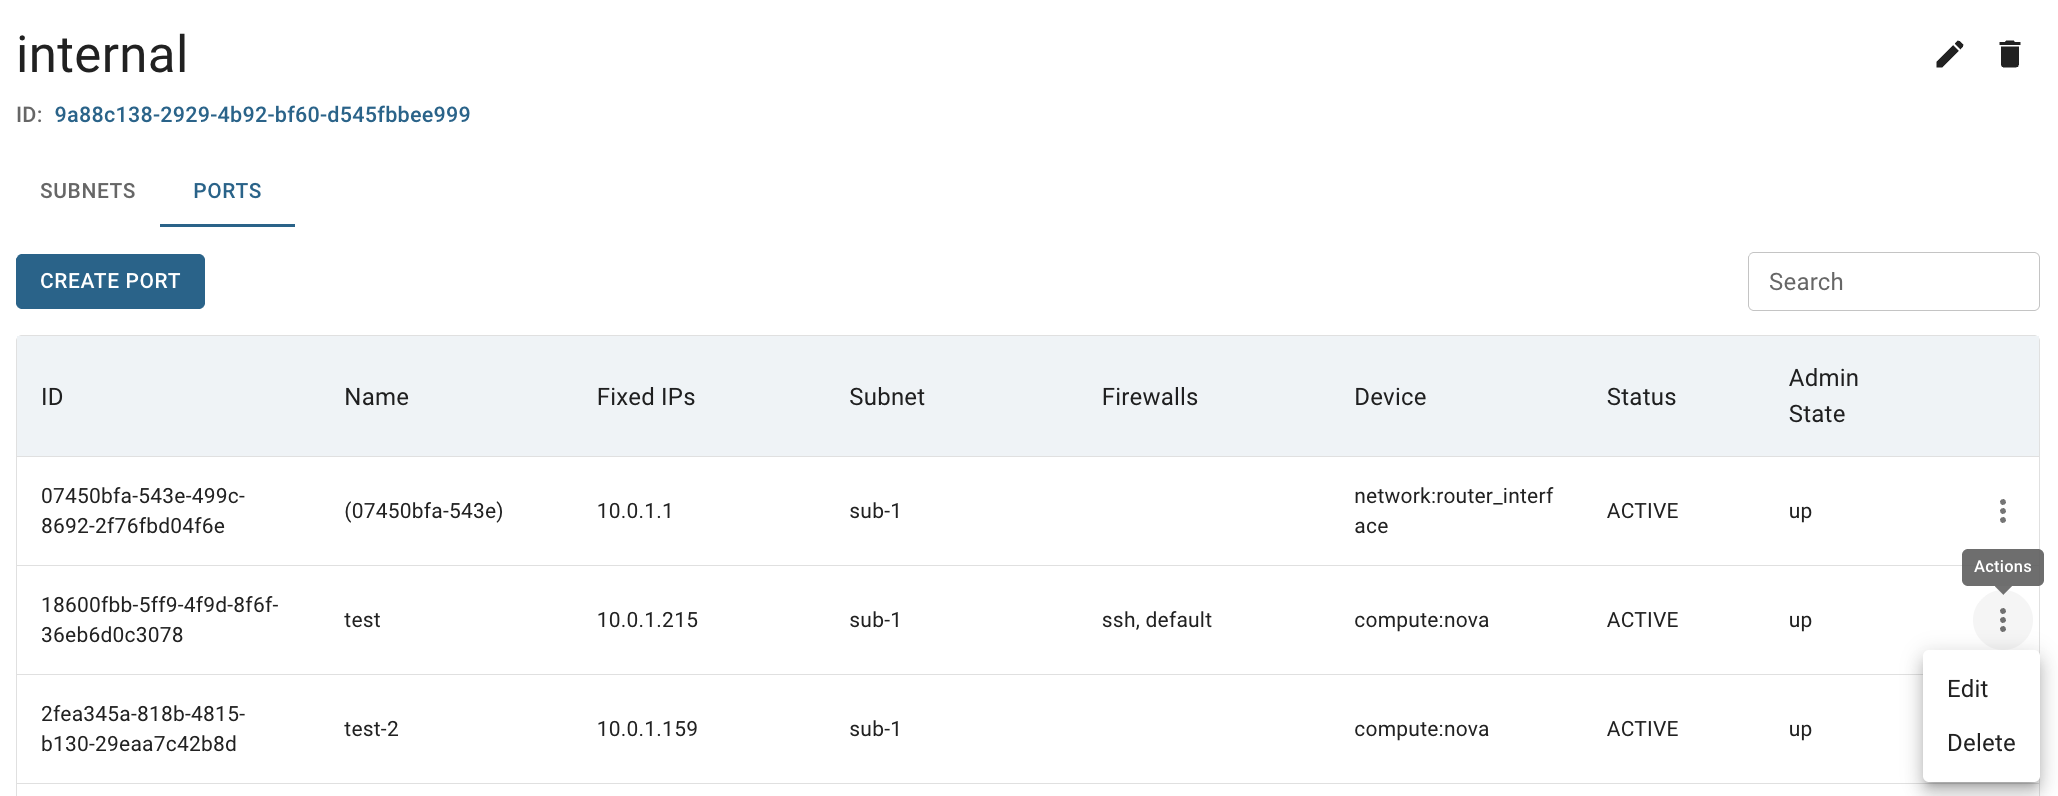
Actions icon opens the next list of available management actions for the selected Port:
- Edit - this option is used to update selected Subnet (change Name and/or Admin State);
- Delete - this option is for Port removing.
Create Port
To create new Port, do the following:
- go to the Ports page and click on the CREATE PORT icon in the upper left corner;
- fill in the form on the next opened Create Port window and click on the CREATE icon:
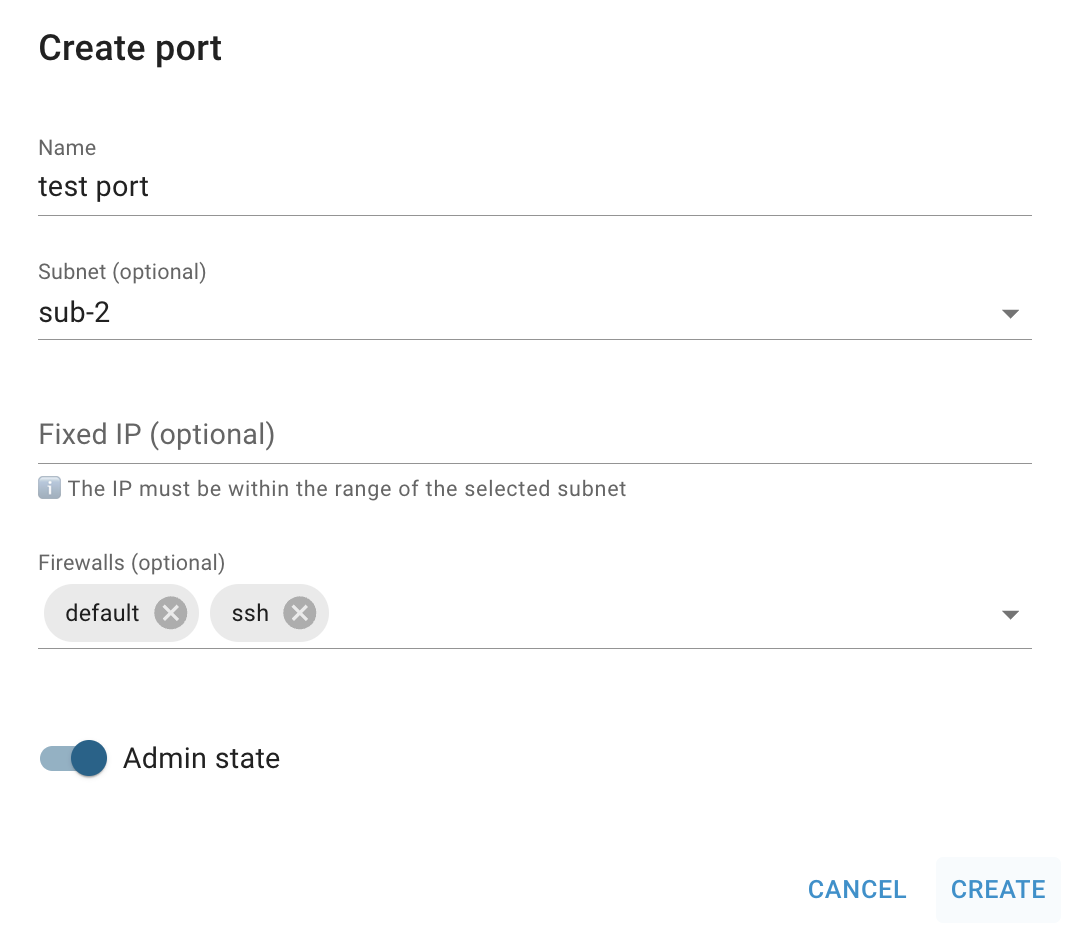
- Name - specify a name for the port.
- Subnet - optionally select the subnet where the port will be created;
- Fixed IP - optionally specify a fixed IP address within the selected subnet; the IP must be within the subnet range;
- Firewalls - optionally assign one or more firewall groups to the port; cannot be configured when Port Security is disabled;
- Port security - enable or disable port-level security enforcement; when enabled, the port applies anti-spoofing rules and allows firewall groups to be attached.
- Admin state - enable or disable the port administratively; when disabled, the port will not pass traffic regardless of its connection state;
- Configure allowed address pairs - optionally define one or more additional IP addresses (or CIDR ranges) that are permitted to send traffic through this port (cannot be configured when Port Security is disabled;):
- IP address - specify an IP address or CIDR range (e.g.
10.0.0.1or10.0.0.0/24); - MAC address - optionally specify a MAC address to restrict the pair to a particular network interface.
- IP address - specify an IP address or CIDR range (e.g.
Allowed address pairs extend the set of source addresses the port is allowed to use beyond its own assigned IP. By default, port security blocks traffic from any address not assigned to the port. Allowed address pairs override this restriction for specific IPs or subnets — making them useful for virtual IP (VIP) failover between instances, load balancer virtual addresses, and network appliances that forward traffic on behalf of multiple IPs.
After these steps, the newly created Port will be added to the Ports page and you can either attach it to an existing Virtual Machine or associate it during the VM creation process.
Attach Port to the VM
There are two ways add already created Port to the Virtual Machine:
- from the Virtual Machines page on the step of creating VM:
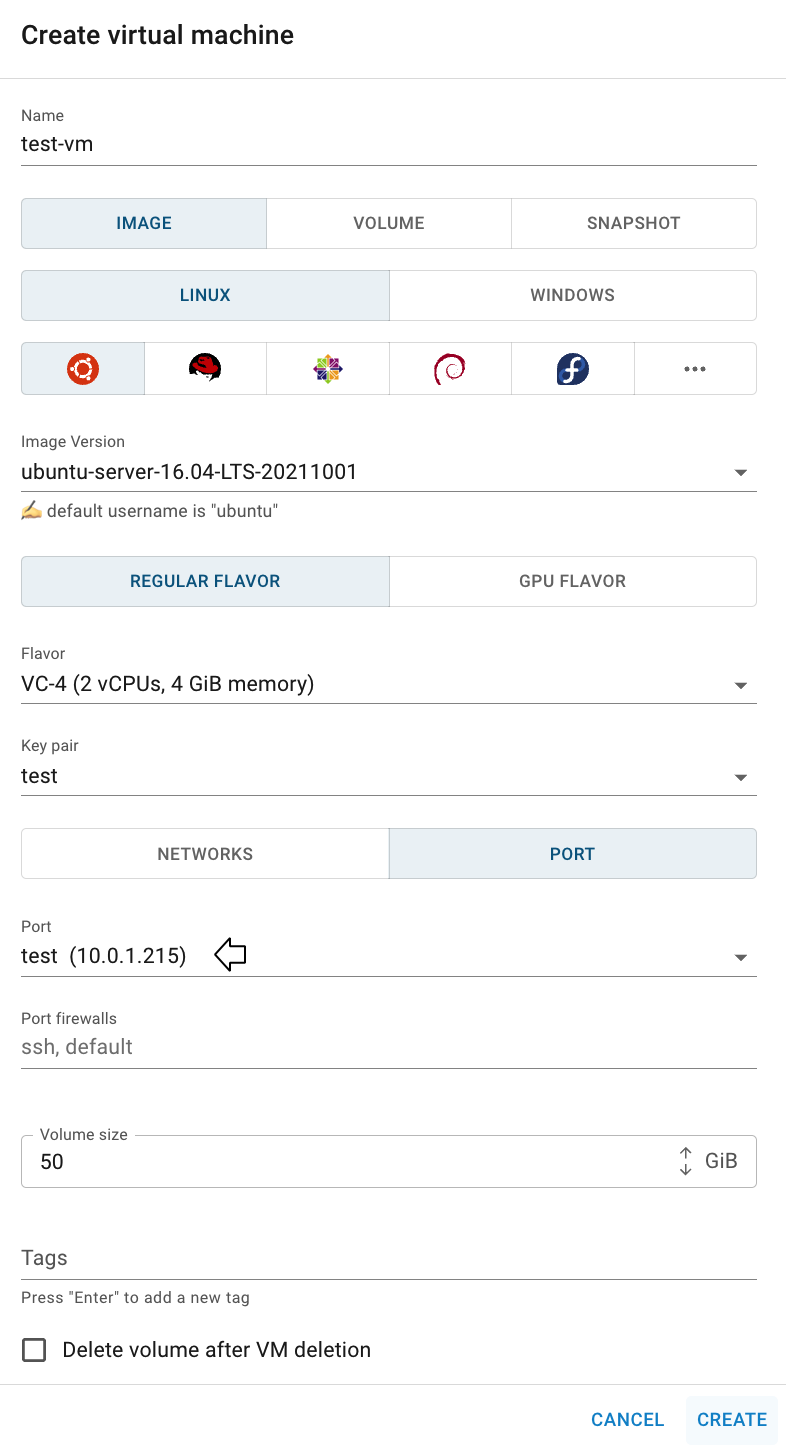
💡 To find information about how to create Virtual Machine see the article - Virtual Machines.
- from the NETWORKS & SECURITY TAB on the Virtual Machine details page:
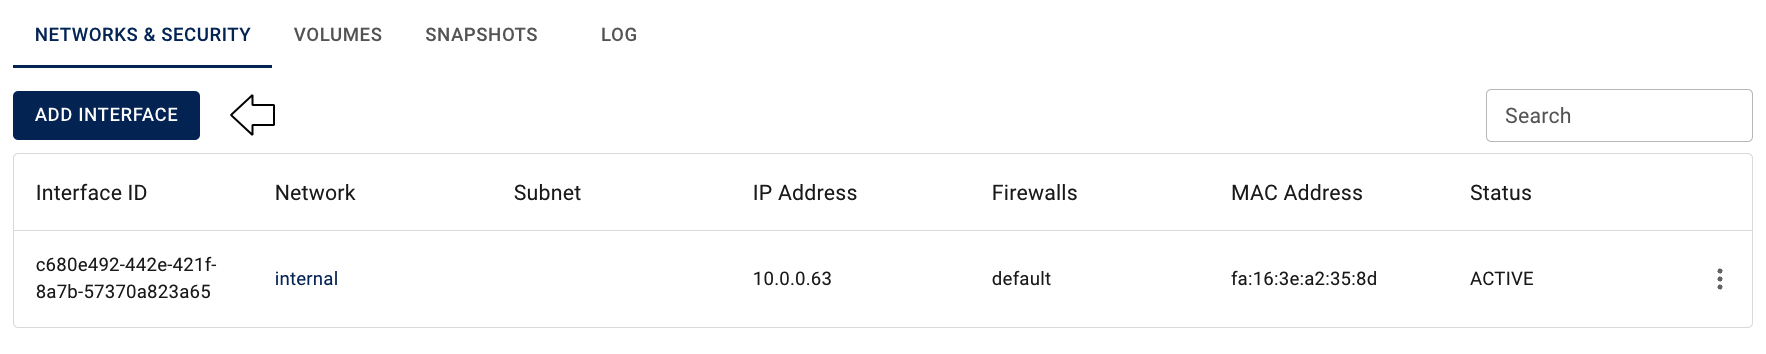
💡 Detailed information how to change the current set of the VM’s Interfaces from the VM details page you can find in article: VM’s Networks and Interfaces.
Edit Port
📌 The Edit action is available only for Ports associated with virtual machines.
To edit the Port, do the following:
- identify the Port, that you want to edit, on the Ports page;
- click on the Actions icon and select the Edit in the list of available options;
- update the necessary fields on the next opened Edit Port window and click on the SAVE icon:
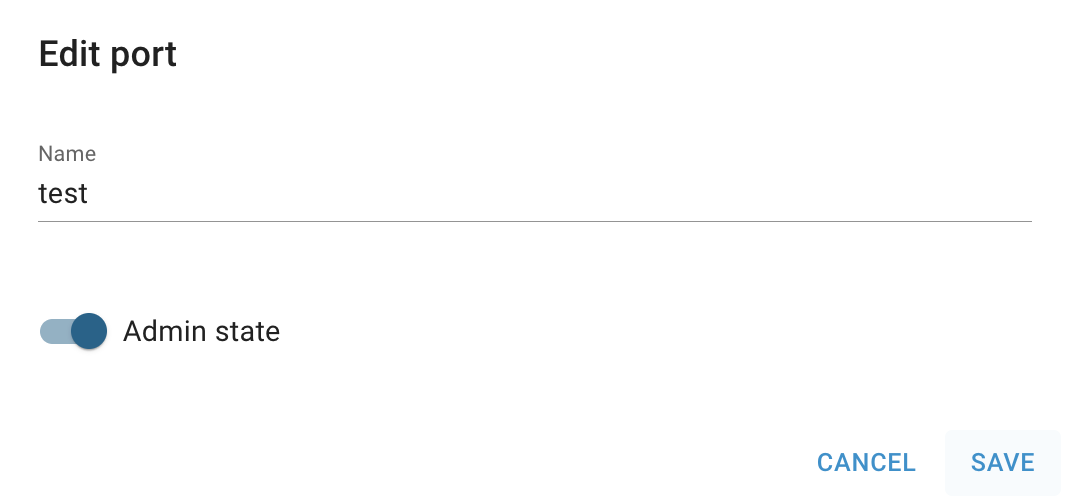
⚠️ Firewalls and Allowed Address Pairs cannot be configured when Port Security is disabled.
After these steps, the selected Port will be updated.
Enable/Disable Port
To disable an active Port, do the following:
- identify this Port on the Ports page and ensure, that it is an ACTIVE state;
- click on the Actions icon and select the Disable in the list of available options;
- confirm the action in the next opened Confirmation window.
After these steps, the selected Port will become inactive, and its status and state will change to DOWN.
To enable it again, click the Actions icon and select Enable. The Port status will change to ACTIVE, and the state will be set to UP.
Delete Port
To delete the Port, do the following:
- to identify this unnecessary Port on the Ports page and ensure, that this it isn’t still used by other cloud resources;
- click on the Actions icon and select the Delete in the list of available options;
- confirm the Port deletion on the next opened Confirmation window.
After these steps, the selected Port will be deleted.