Routers
On this page, you can find an explanation of how to create, edit, delete Routers and how to manage Interfaces inside them in Cloud Console.
Table of contents
Routers
Router is an important infrastructure component that can come in handy when you need to:
- Provide access to the internet for instances provisioned in a private network;
- Interconnect two or more networks;
- Manage routes for traffic in advanced network scenarios;
Routers page
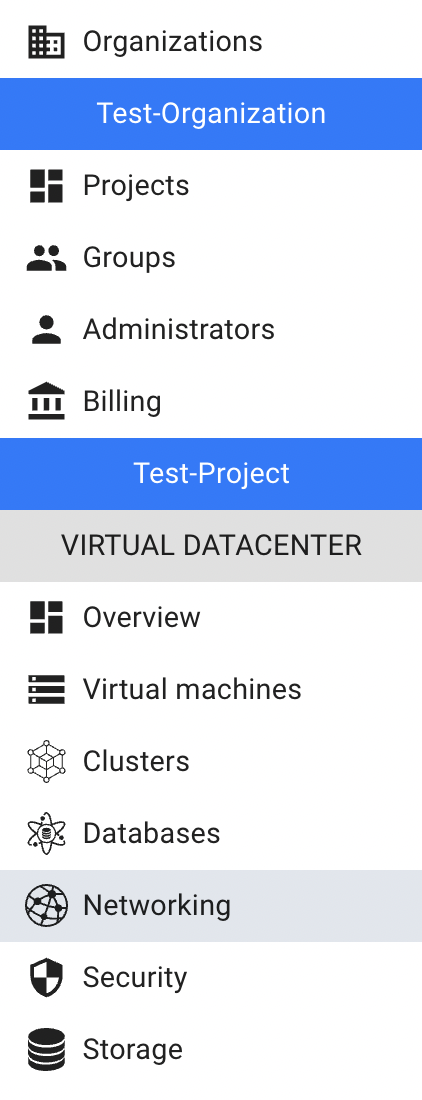
To get to the Routers page, select the Networking from the VIRTUAL DATACENTER block in the side-bar menu and click the Routers TAB:

On this page you can find all Routers created in the current Project, with the Create button, Search bar and Actions icon, which opens a list of available management actions for the selected Routers:
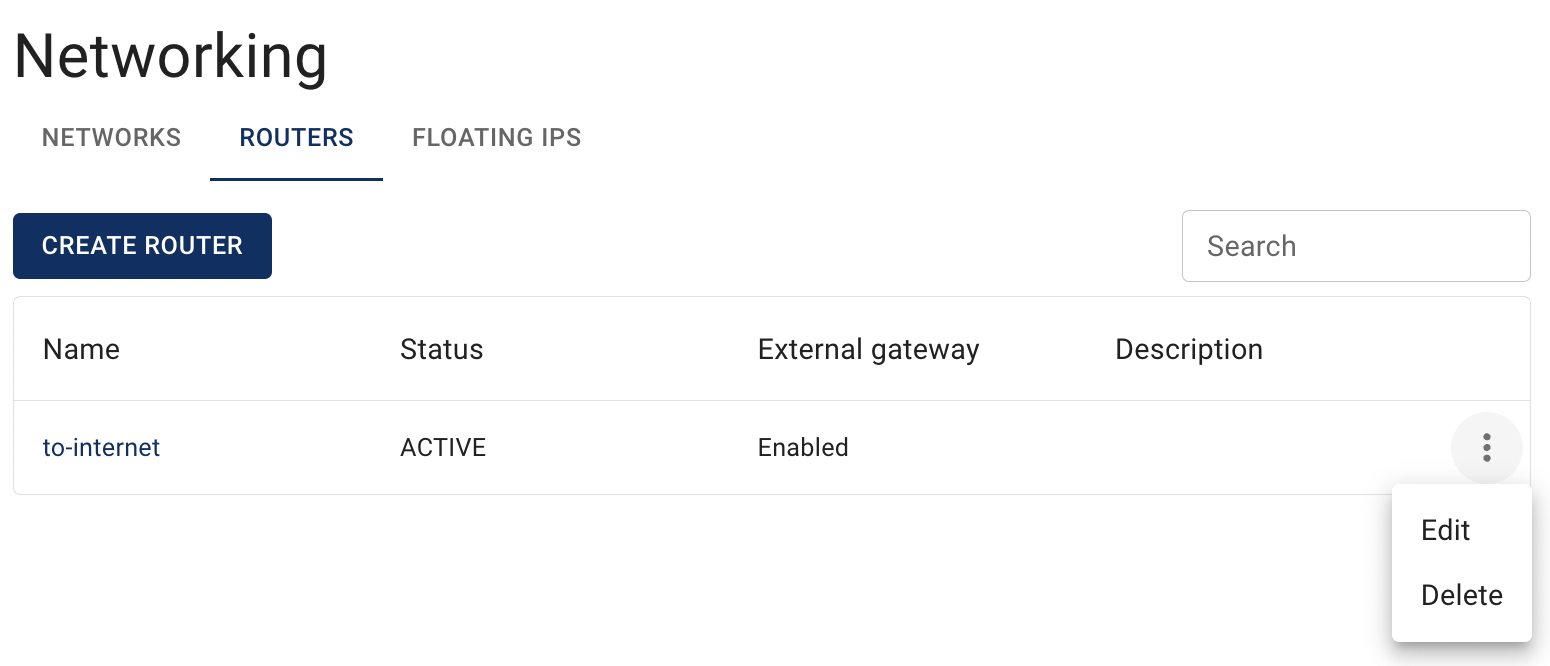
Actions icon opens the next list of available management actions for the selected Router:
- Edit - this option is used to update name/description of the selected Router;
- Enable/Disable - this option is used to control whether a router is active or inactive;
- Delete - this option is for the Router removing.
Create Router
To create new Router, do the following:
- go to the Routers page and click on the CREATE ROUTER in the upper left corner;
- fill in the form on the next opened Create Router window and click on the CREATE icon:
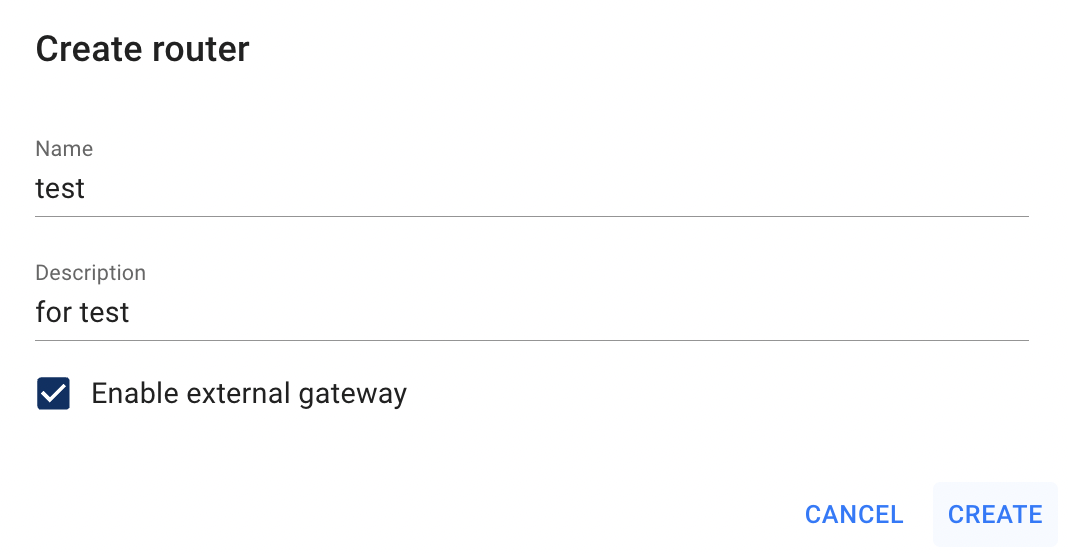
- Name - set a name for the Router;
- Description - set a description for the new Router;
- Enable external gateway - select it if you want to use the router as a gateway for instances created in private network. In other words, it will let instances from private network access to internet.
After these steps, the newly created Router will be added to the Routers page with the status ACTIVE.
Add Interface to the Router
Router can be connected to one or more private networks by adding it’s interface to network.
To add Interfaces to the already created Router do the following:
- ensure that you have already created Network with associated Subnets;
💡 To find information about how to create internal Network and Subnet use the articles Networks, Subnets; - open the Router details page - for this, click on the Name of the corresponding Router:

- click on the ADD INTERFACE icon:
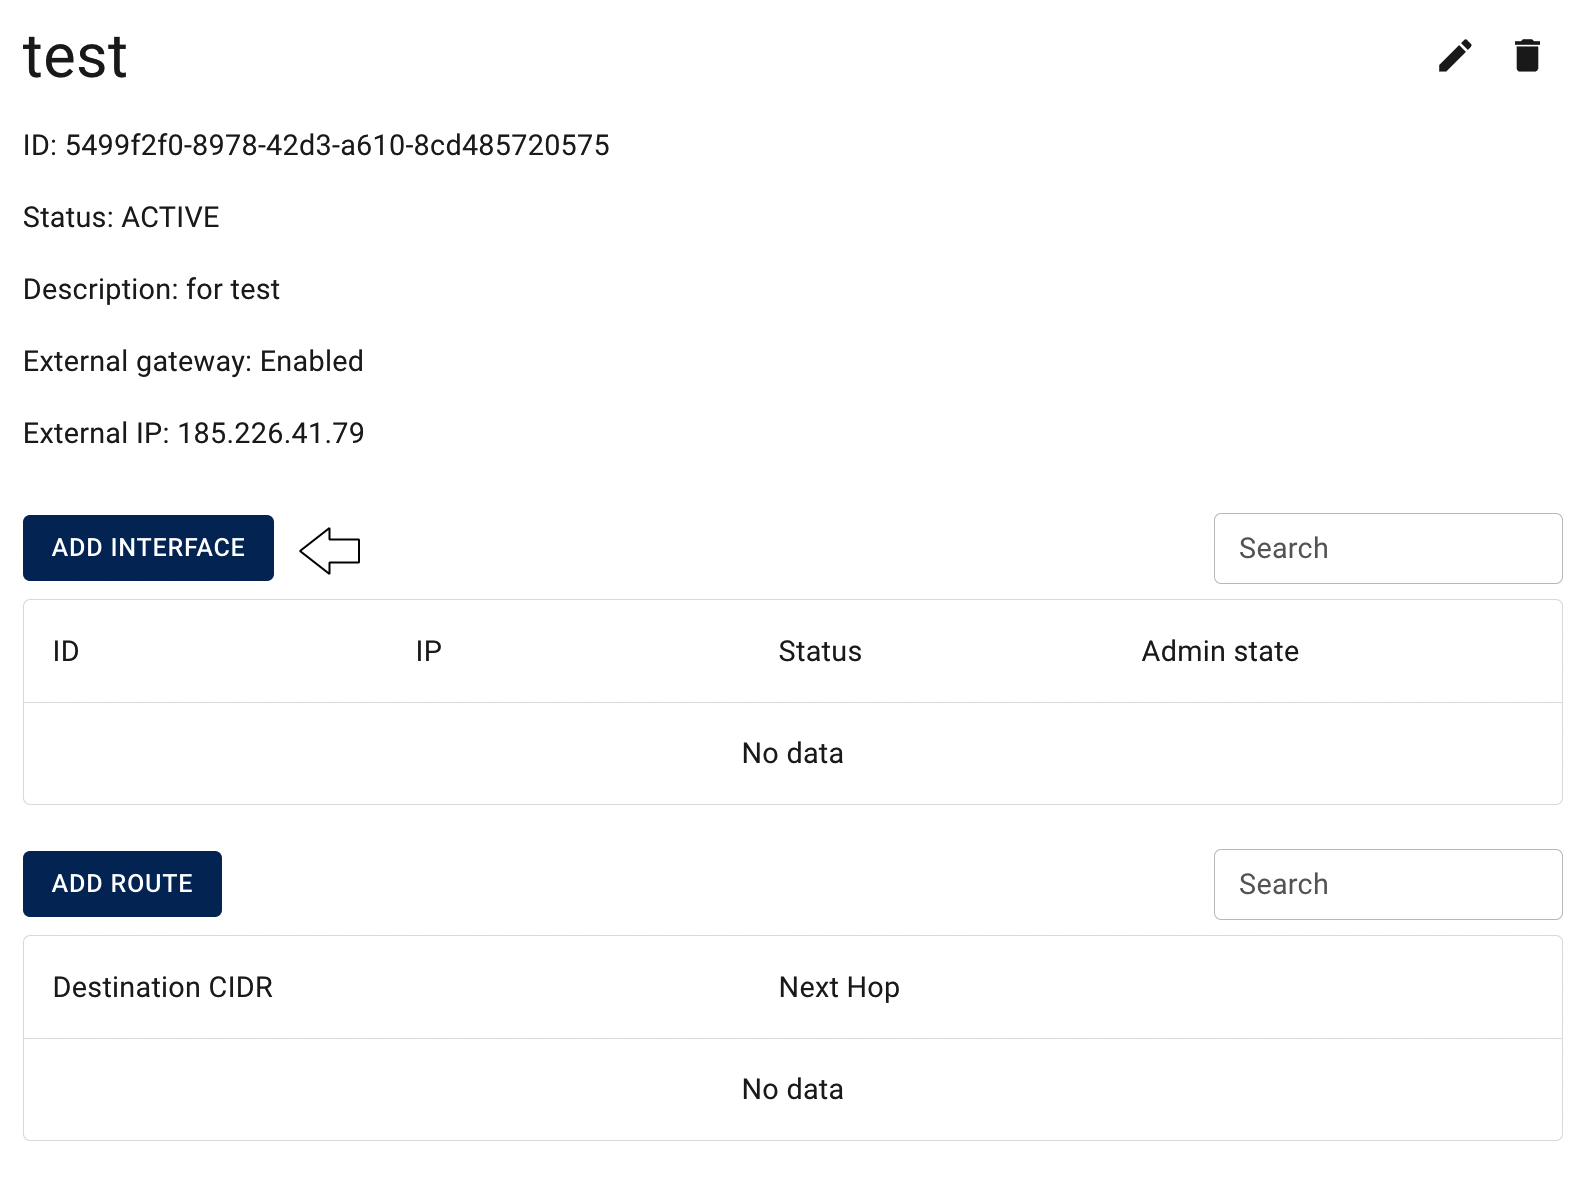
- select one of the available Subnets and click on the ADD icon:

📌 If Router was created with Enabled external gateway all Virtual Machines created in this Subnet will have access to the internet.
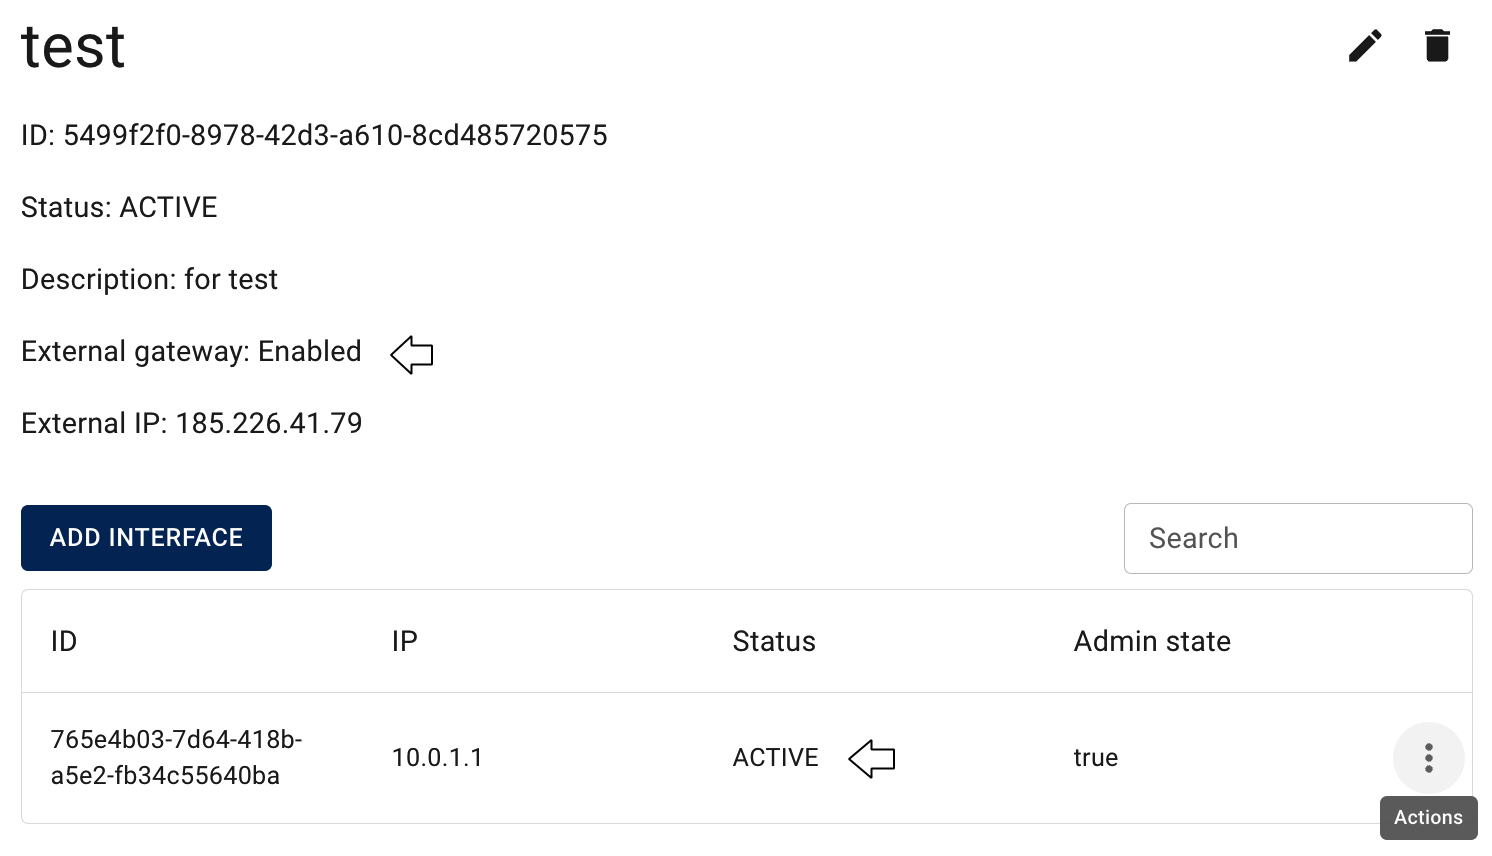
After these steps, the newly added Interface will appear in the Router details page in the ACTIVE status with available action icon for its removing. Now, all Virtual Machines created in this Subnet will have access to the internet, as this Router was created with Enabled external gateway:
Add custom Route to the Router
This step is optional in Router configuration, but if you need to add custom Route to the created Router, do the following:
- open the Router details page - for this, click on the Name of the corresponding Router:

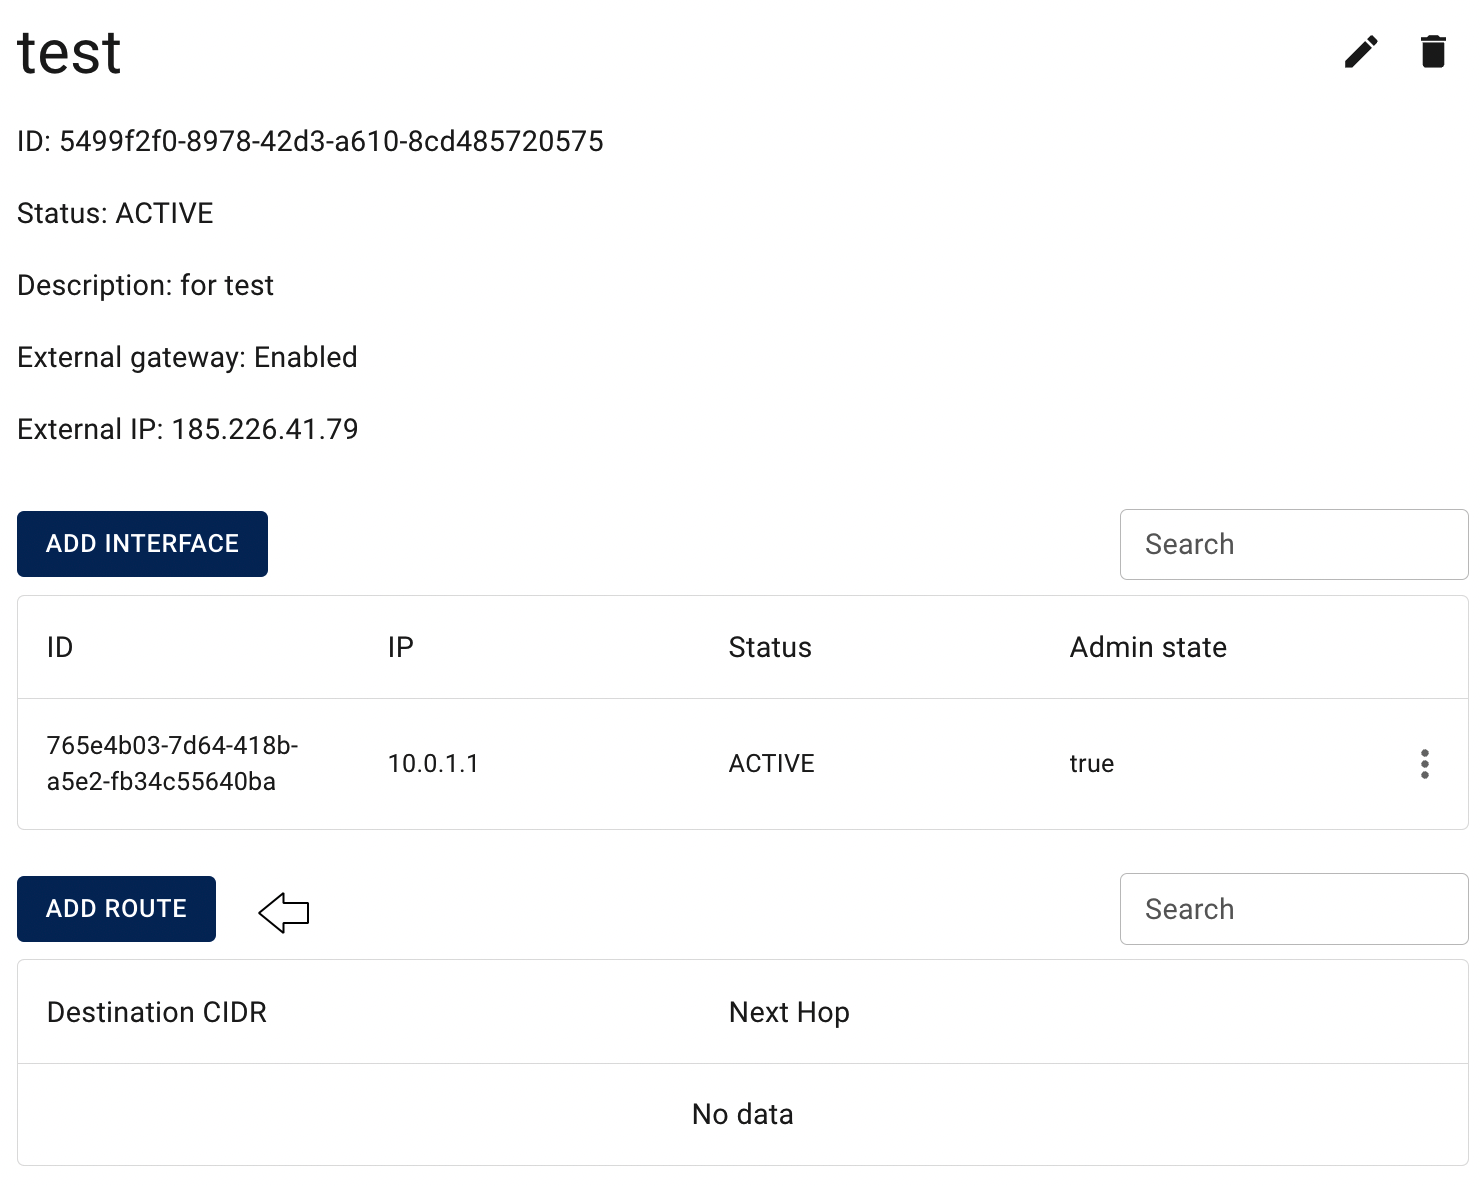
- click on the ADD ROUTE icon:
- fill in the form on the next opened Add Route window and click on the ADD icon:
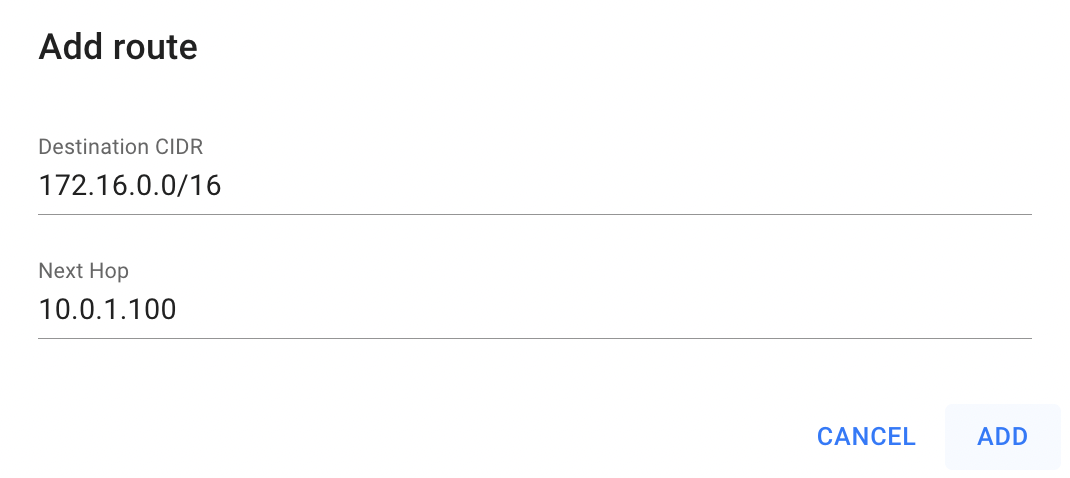
After these steps, the newly added Route will appear on the Router details page with available action icon for its removing:

Edit Router
To edit the Router, do the following:
- identify Router, that you want to edit, on the Routers page;
- click on the Actions icon and select the Edit in the list of available options;
- update the Name or/and Description of the selected Router, on the next opened Edit Router window and click on the SAVE icon.
After these steps, the selected Router will be updated.
Alternatively, you can edit Router from its Details page, by clicking on the appropriative quick actions icon there:

Enable/Disable Router
To enable or disable a Router, do the following:
- identify the Router you want to manage on the Routers page;
- click on the Actions icon and select Enable or Disable from the list of available options;
- confirm your choice in the next Confirmation window.
After these steps, the state of the selected Router will be updated accordingly.
Alternatively, you can enable or disable a Router from its Details page, by clicking on the appropriative quick actions icon there:

Delete Router
To delete Router, do the following:
- identify this unnecessary Router on the Routers page and ensure, that it has no attached interfaces to networks, delete them if any;
- click on the Actions icon and select the Delete in the list of available options;
- confirm the Router deletion on the next opened Confirmation window.
After these steps, the selected Router will be deleted.
Alternatively, you can delete Router from its Details page, by clicking on the appropriative quick actions icon there:
